Navigation
Install the app
How to install the app on iOS
Follow along with the video below to see how to install our site as a web app on your home screen.
Note: This feature may not be available in some browsers.
More options
Style variation
You are using an out of date browser. It may not display this or other websites correctly.
You should upgrade or use an alternative browser.
You should upgrade or use an alternative browser.
GR Yaris (Gen 2) Spoiler Kit Aero - assembly instructions

GRavy_Baby
Obsessed member
With two of you, this will be quite easy -
• Pop the trunk
• Remove the 4 x rubber caps/grommets
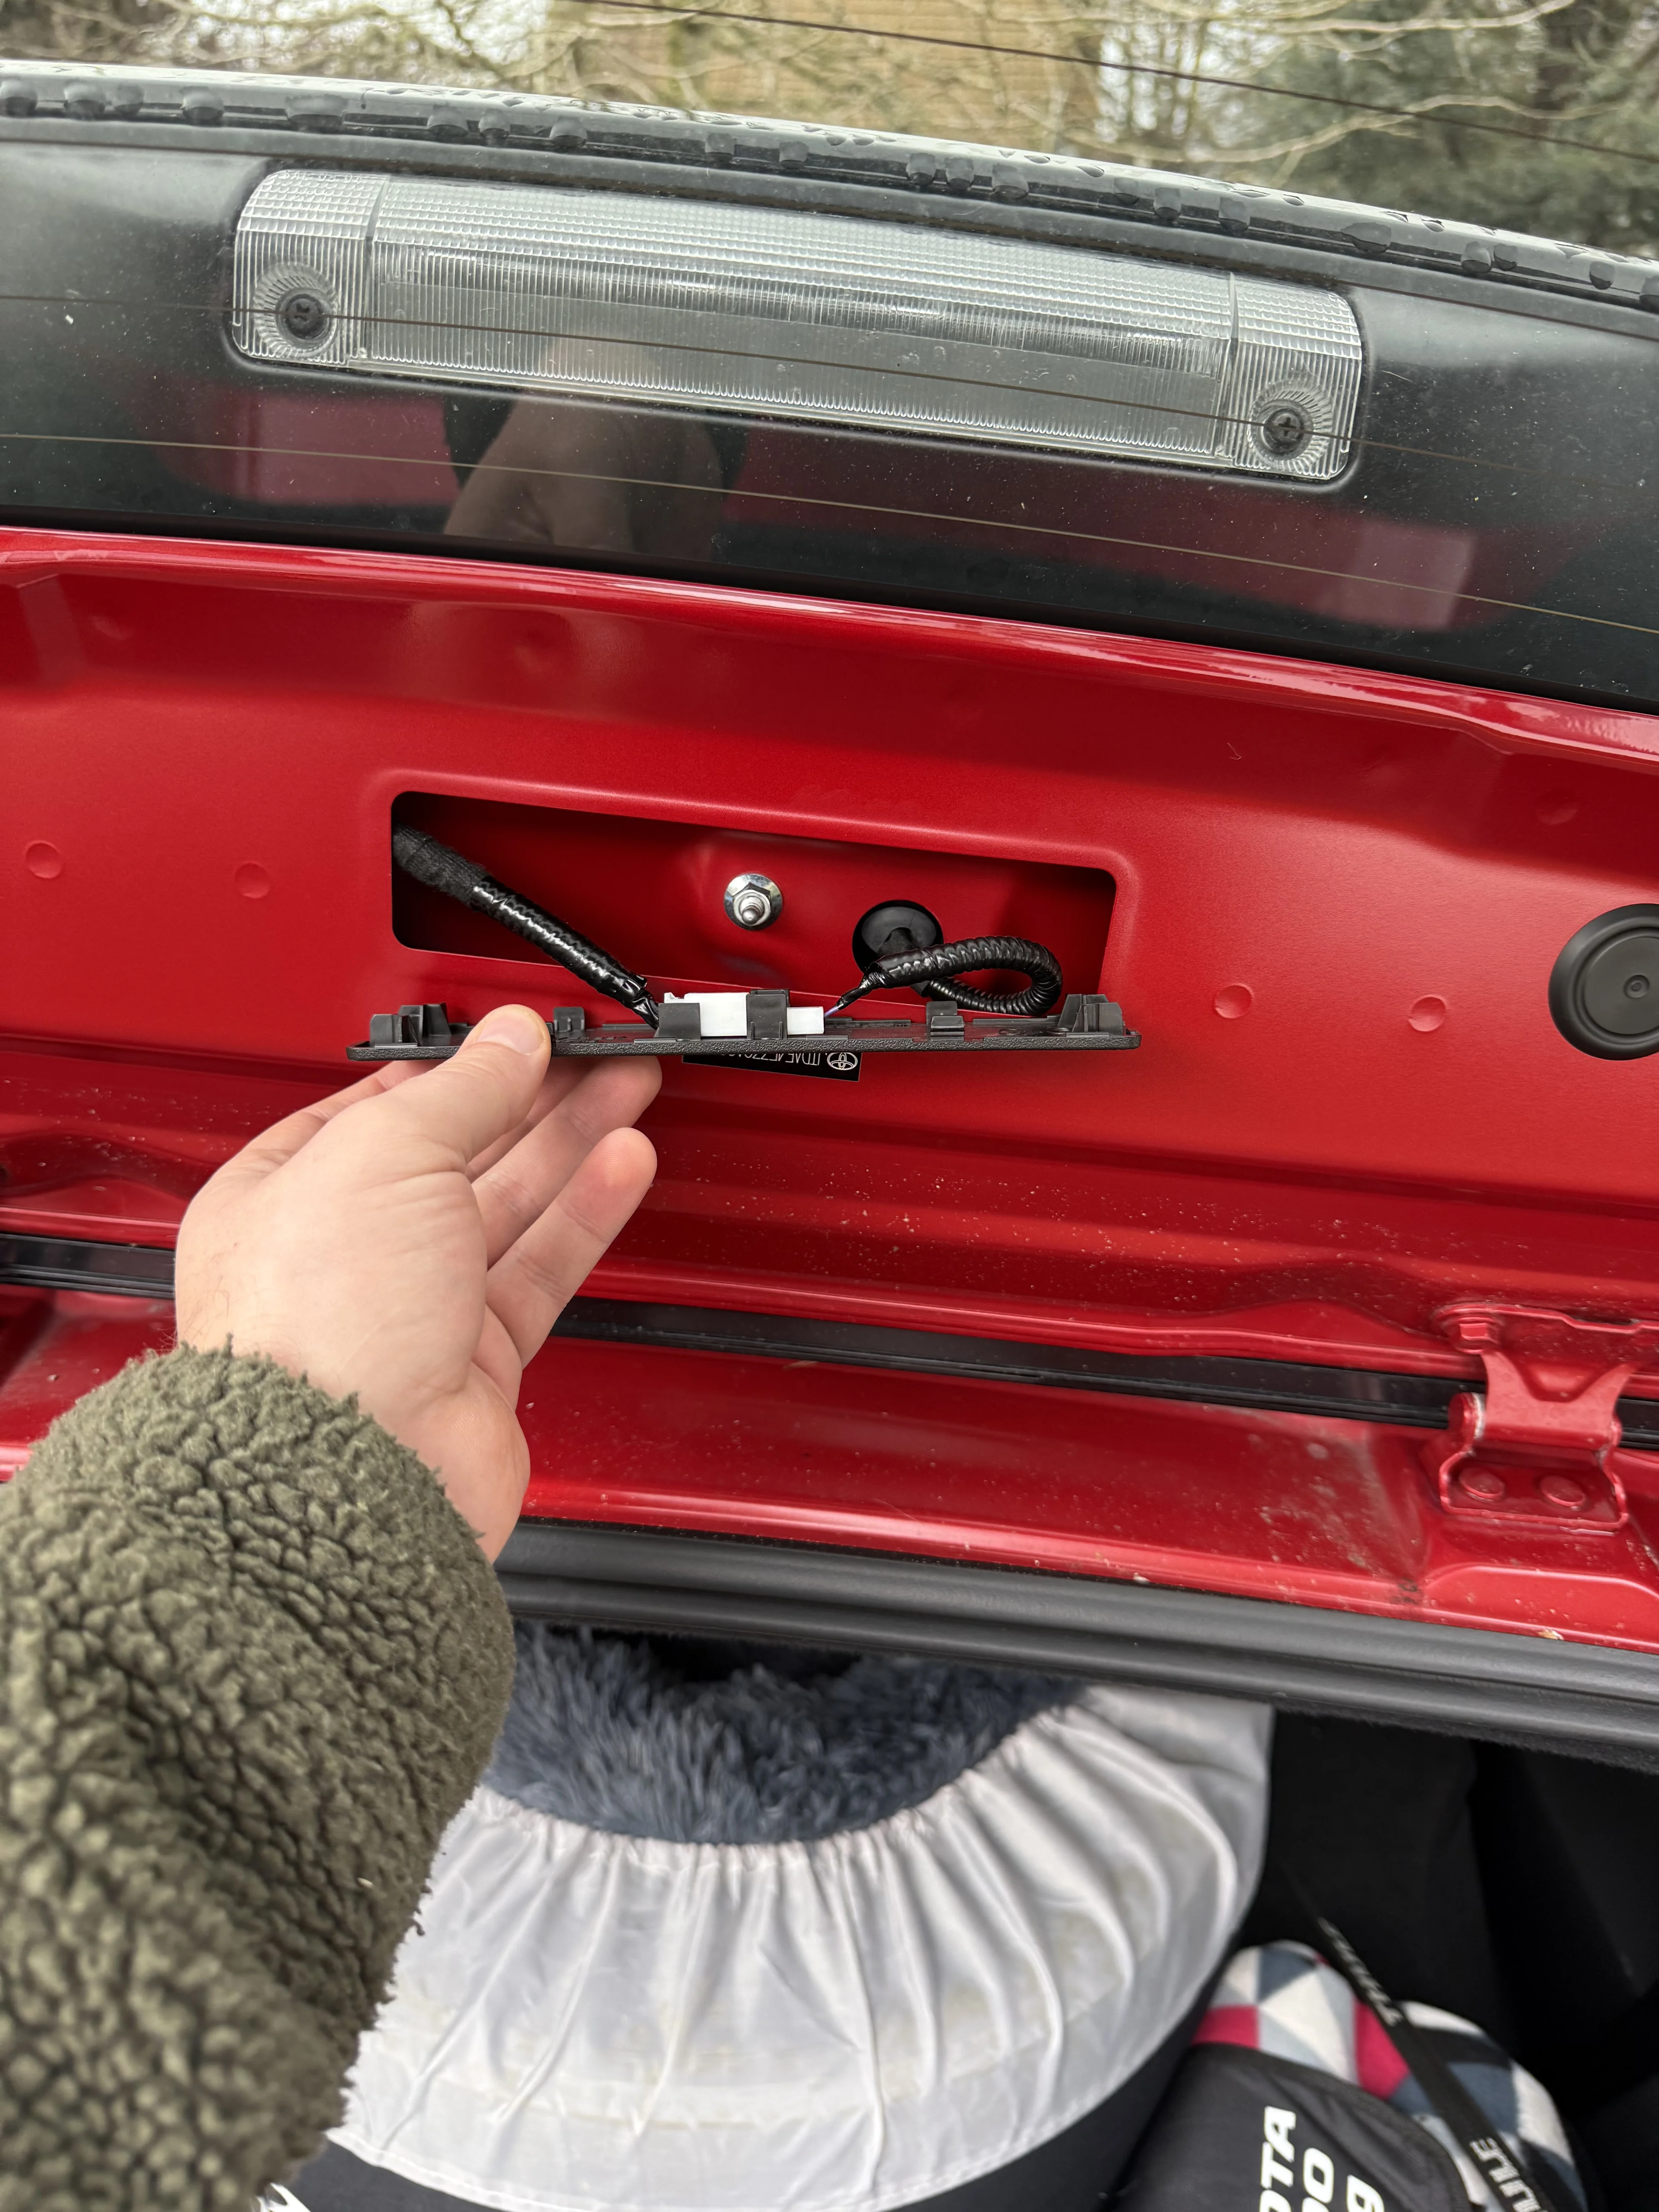
• Release the rectangular plastic plate that has the connector for the HLBL/3rd brake light.
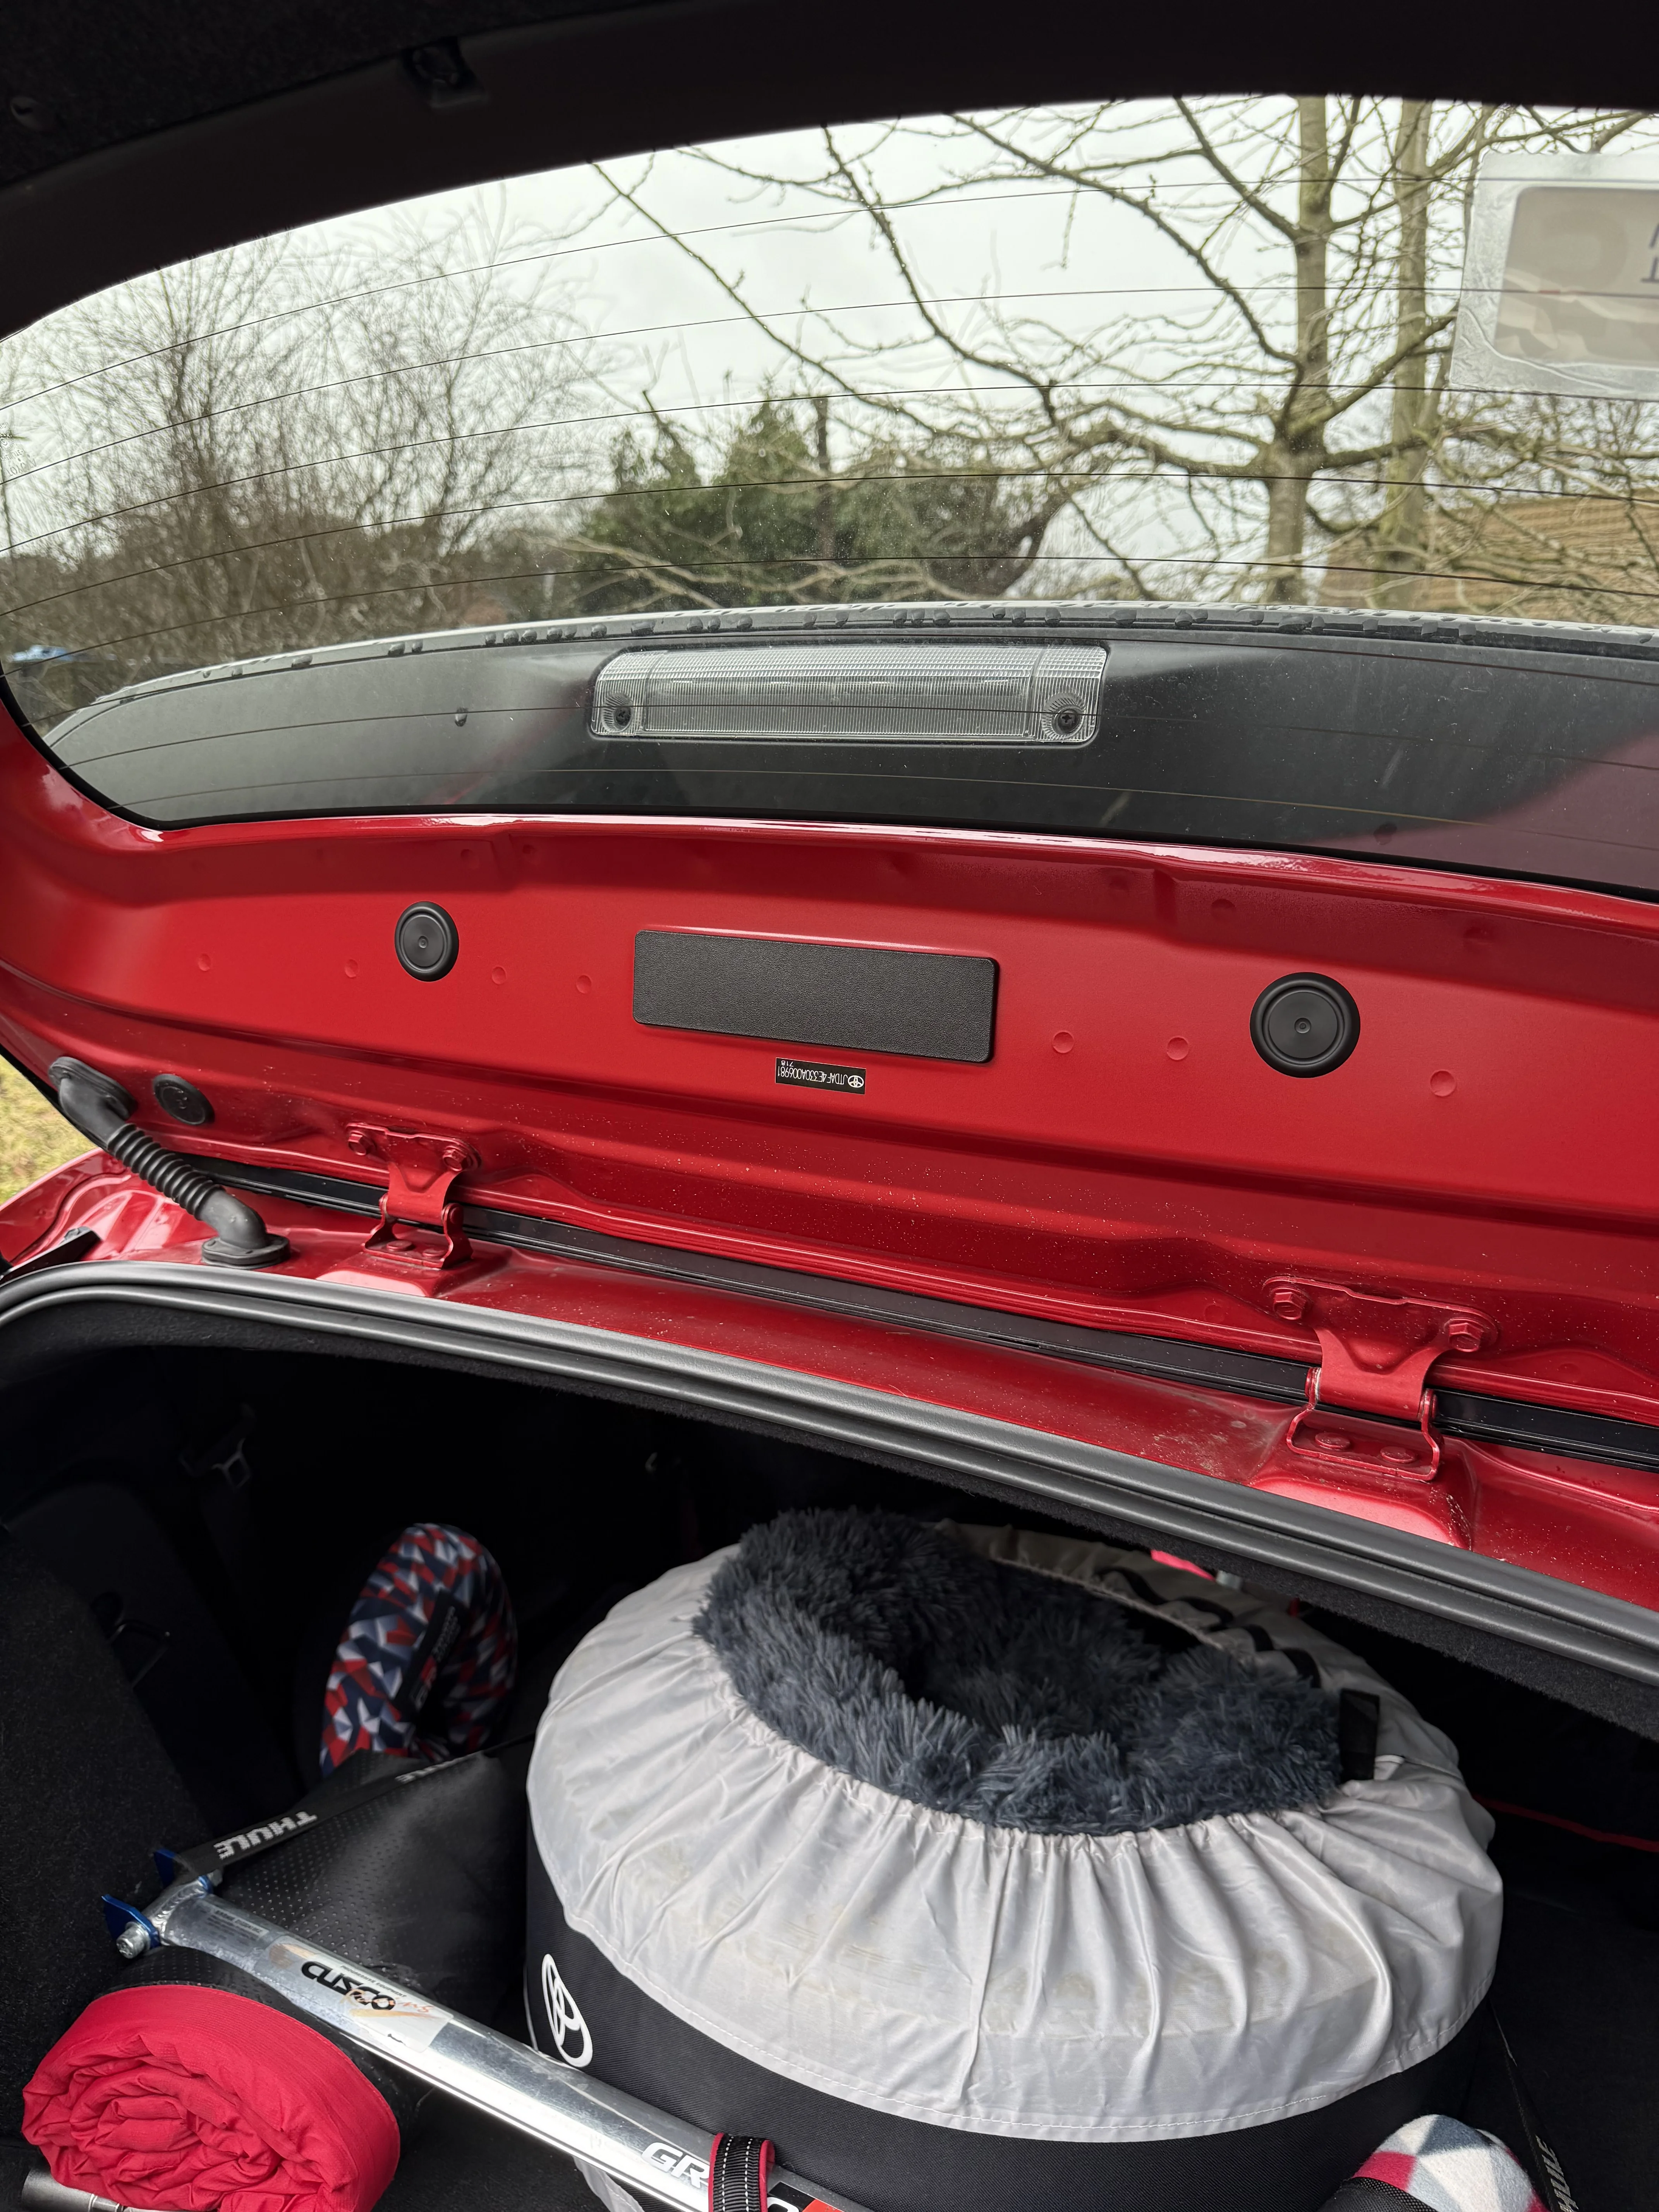
• 3 x nuts & 2 x bolts should now be exposed. One of the nuts is located in the recess behind the rectangular plate/cover. Remove all of these carefully as to not accidentally drop them inside the skin of the hatch/door & disconnected the HLBL.
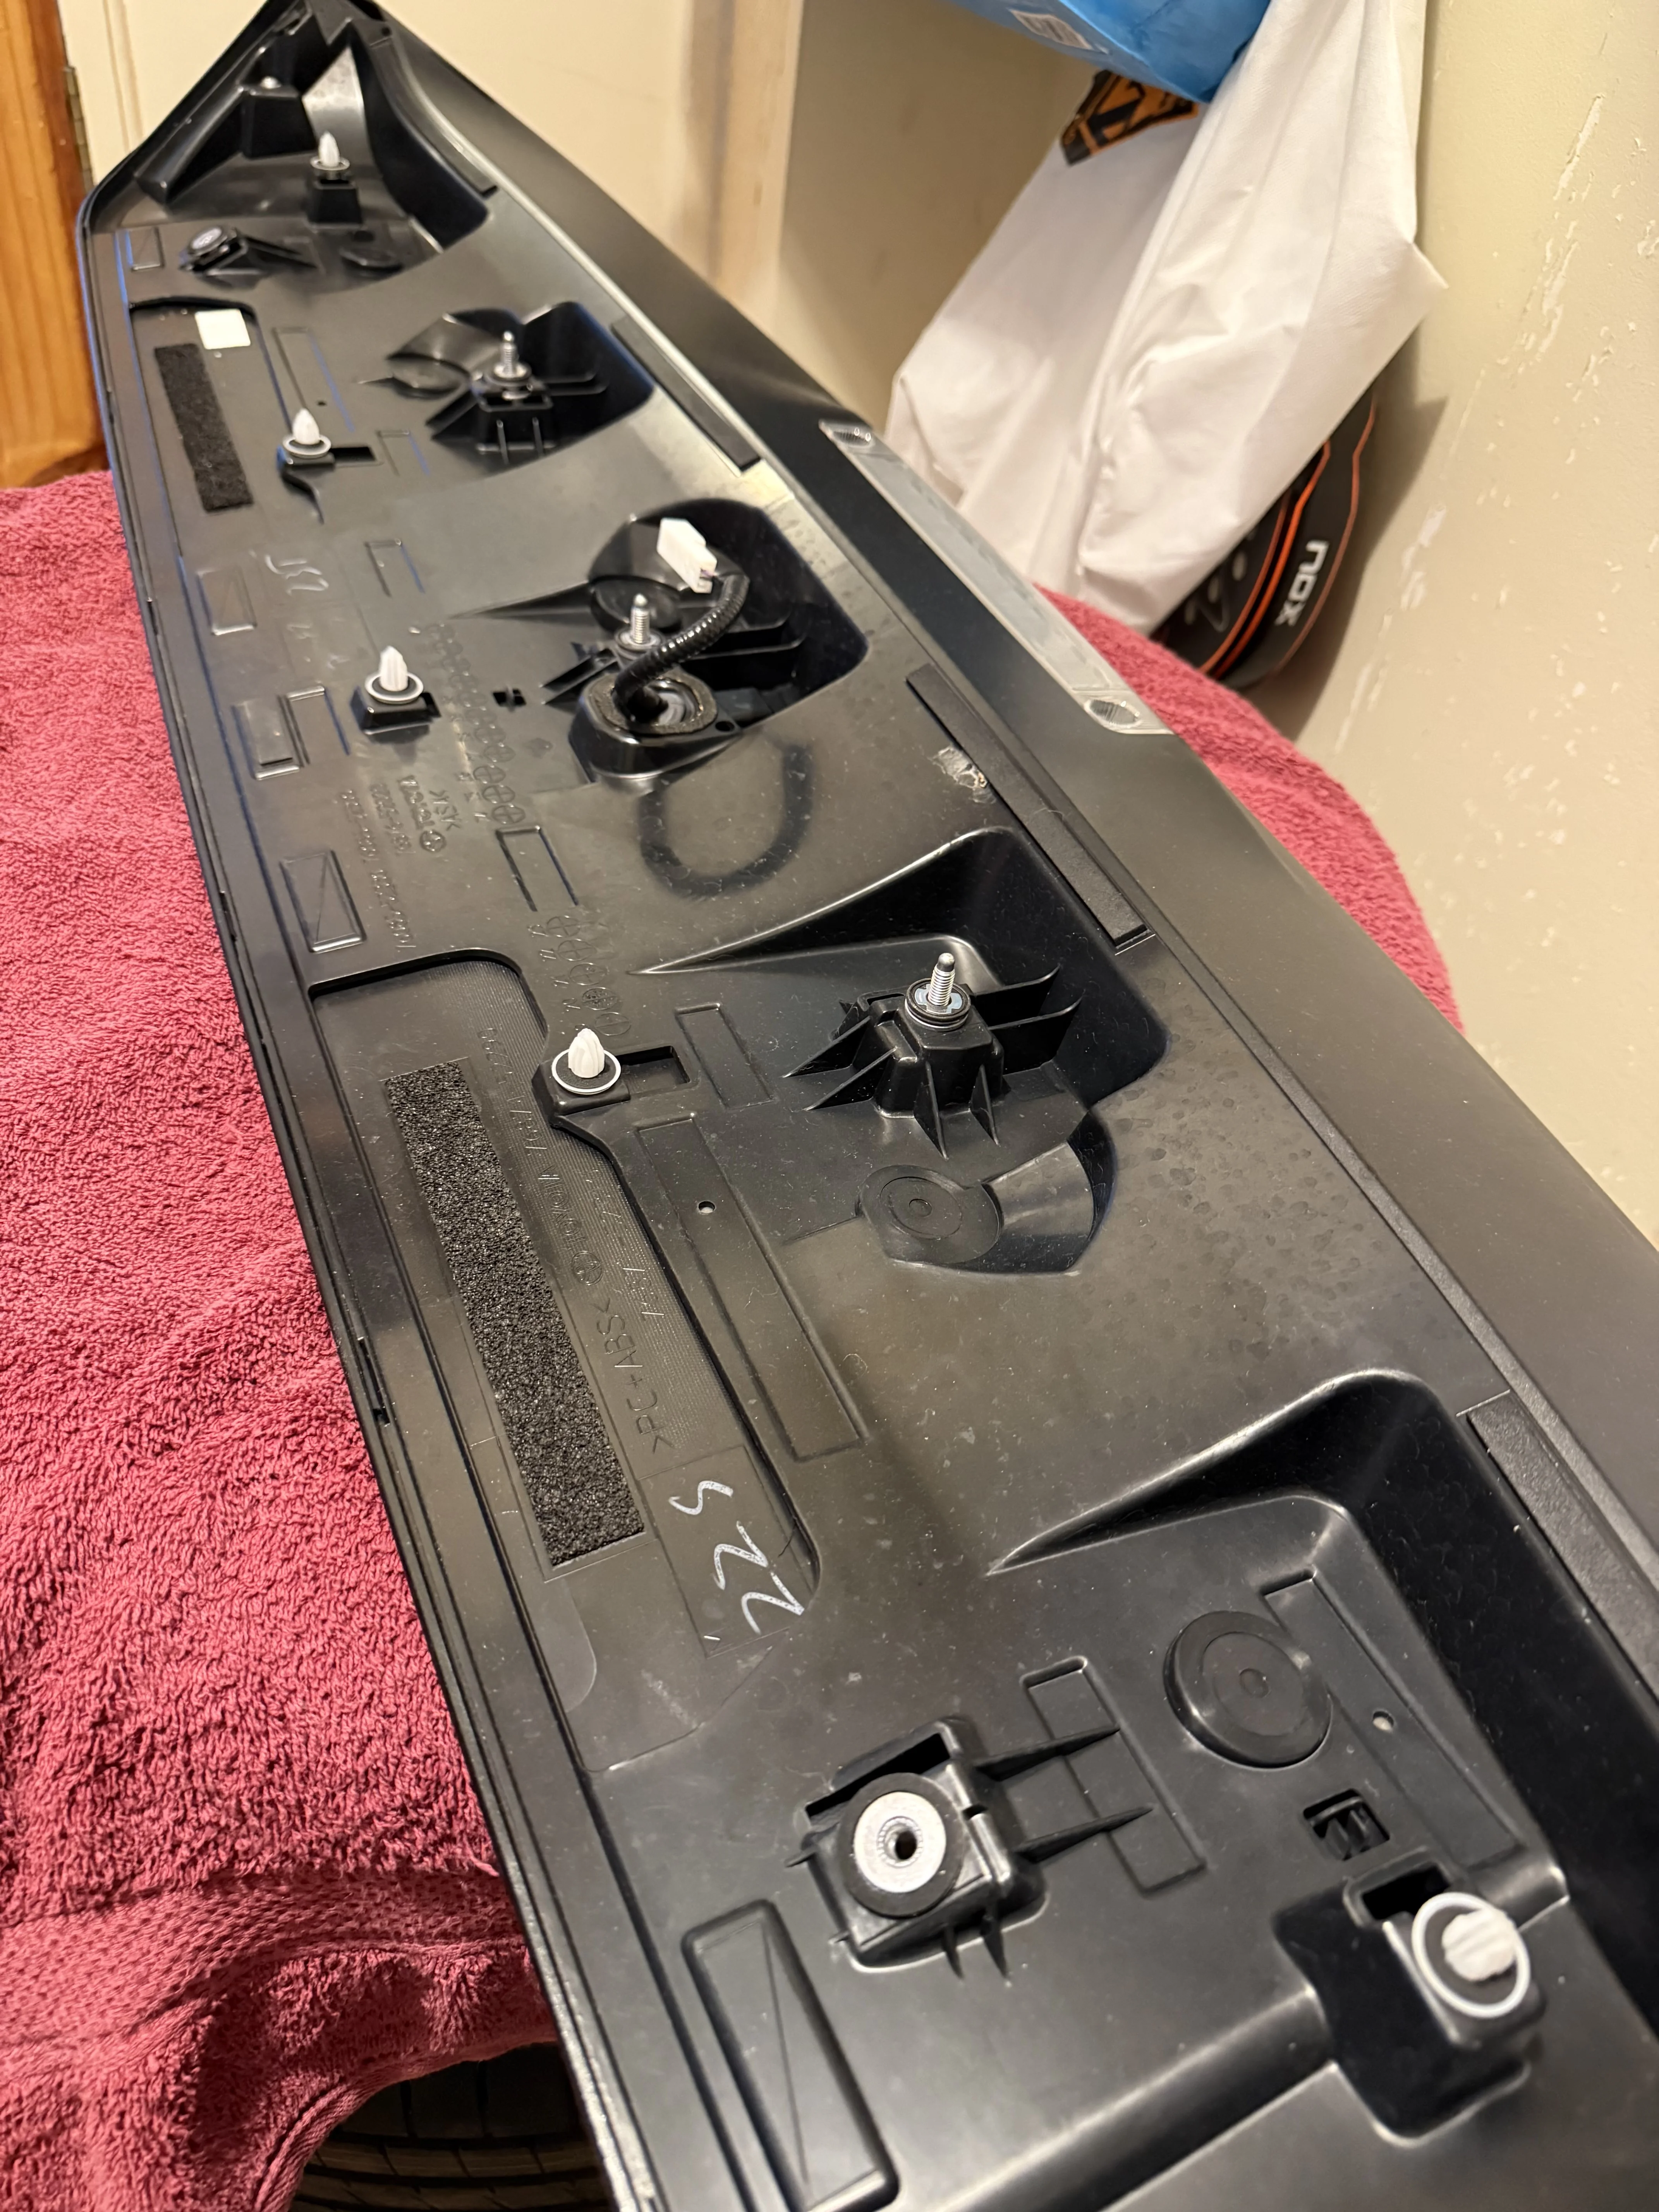
• The existing wing should still be firmly attached to the hatch/door enabling you to access the inside & outside while you work with this. There are 5 x white plastic locators/retainers along the width of the wing keeping it located in place -
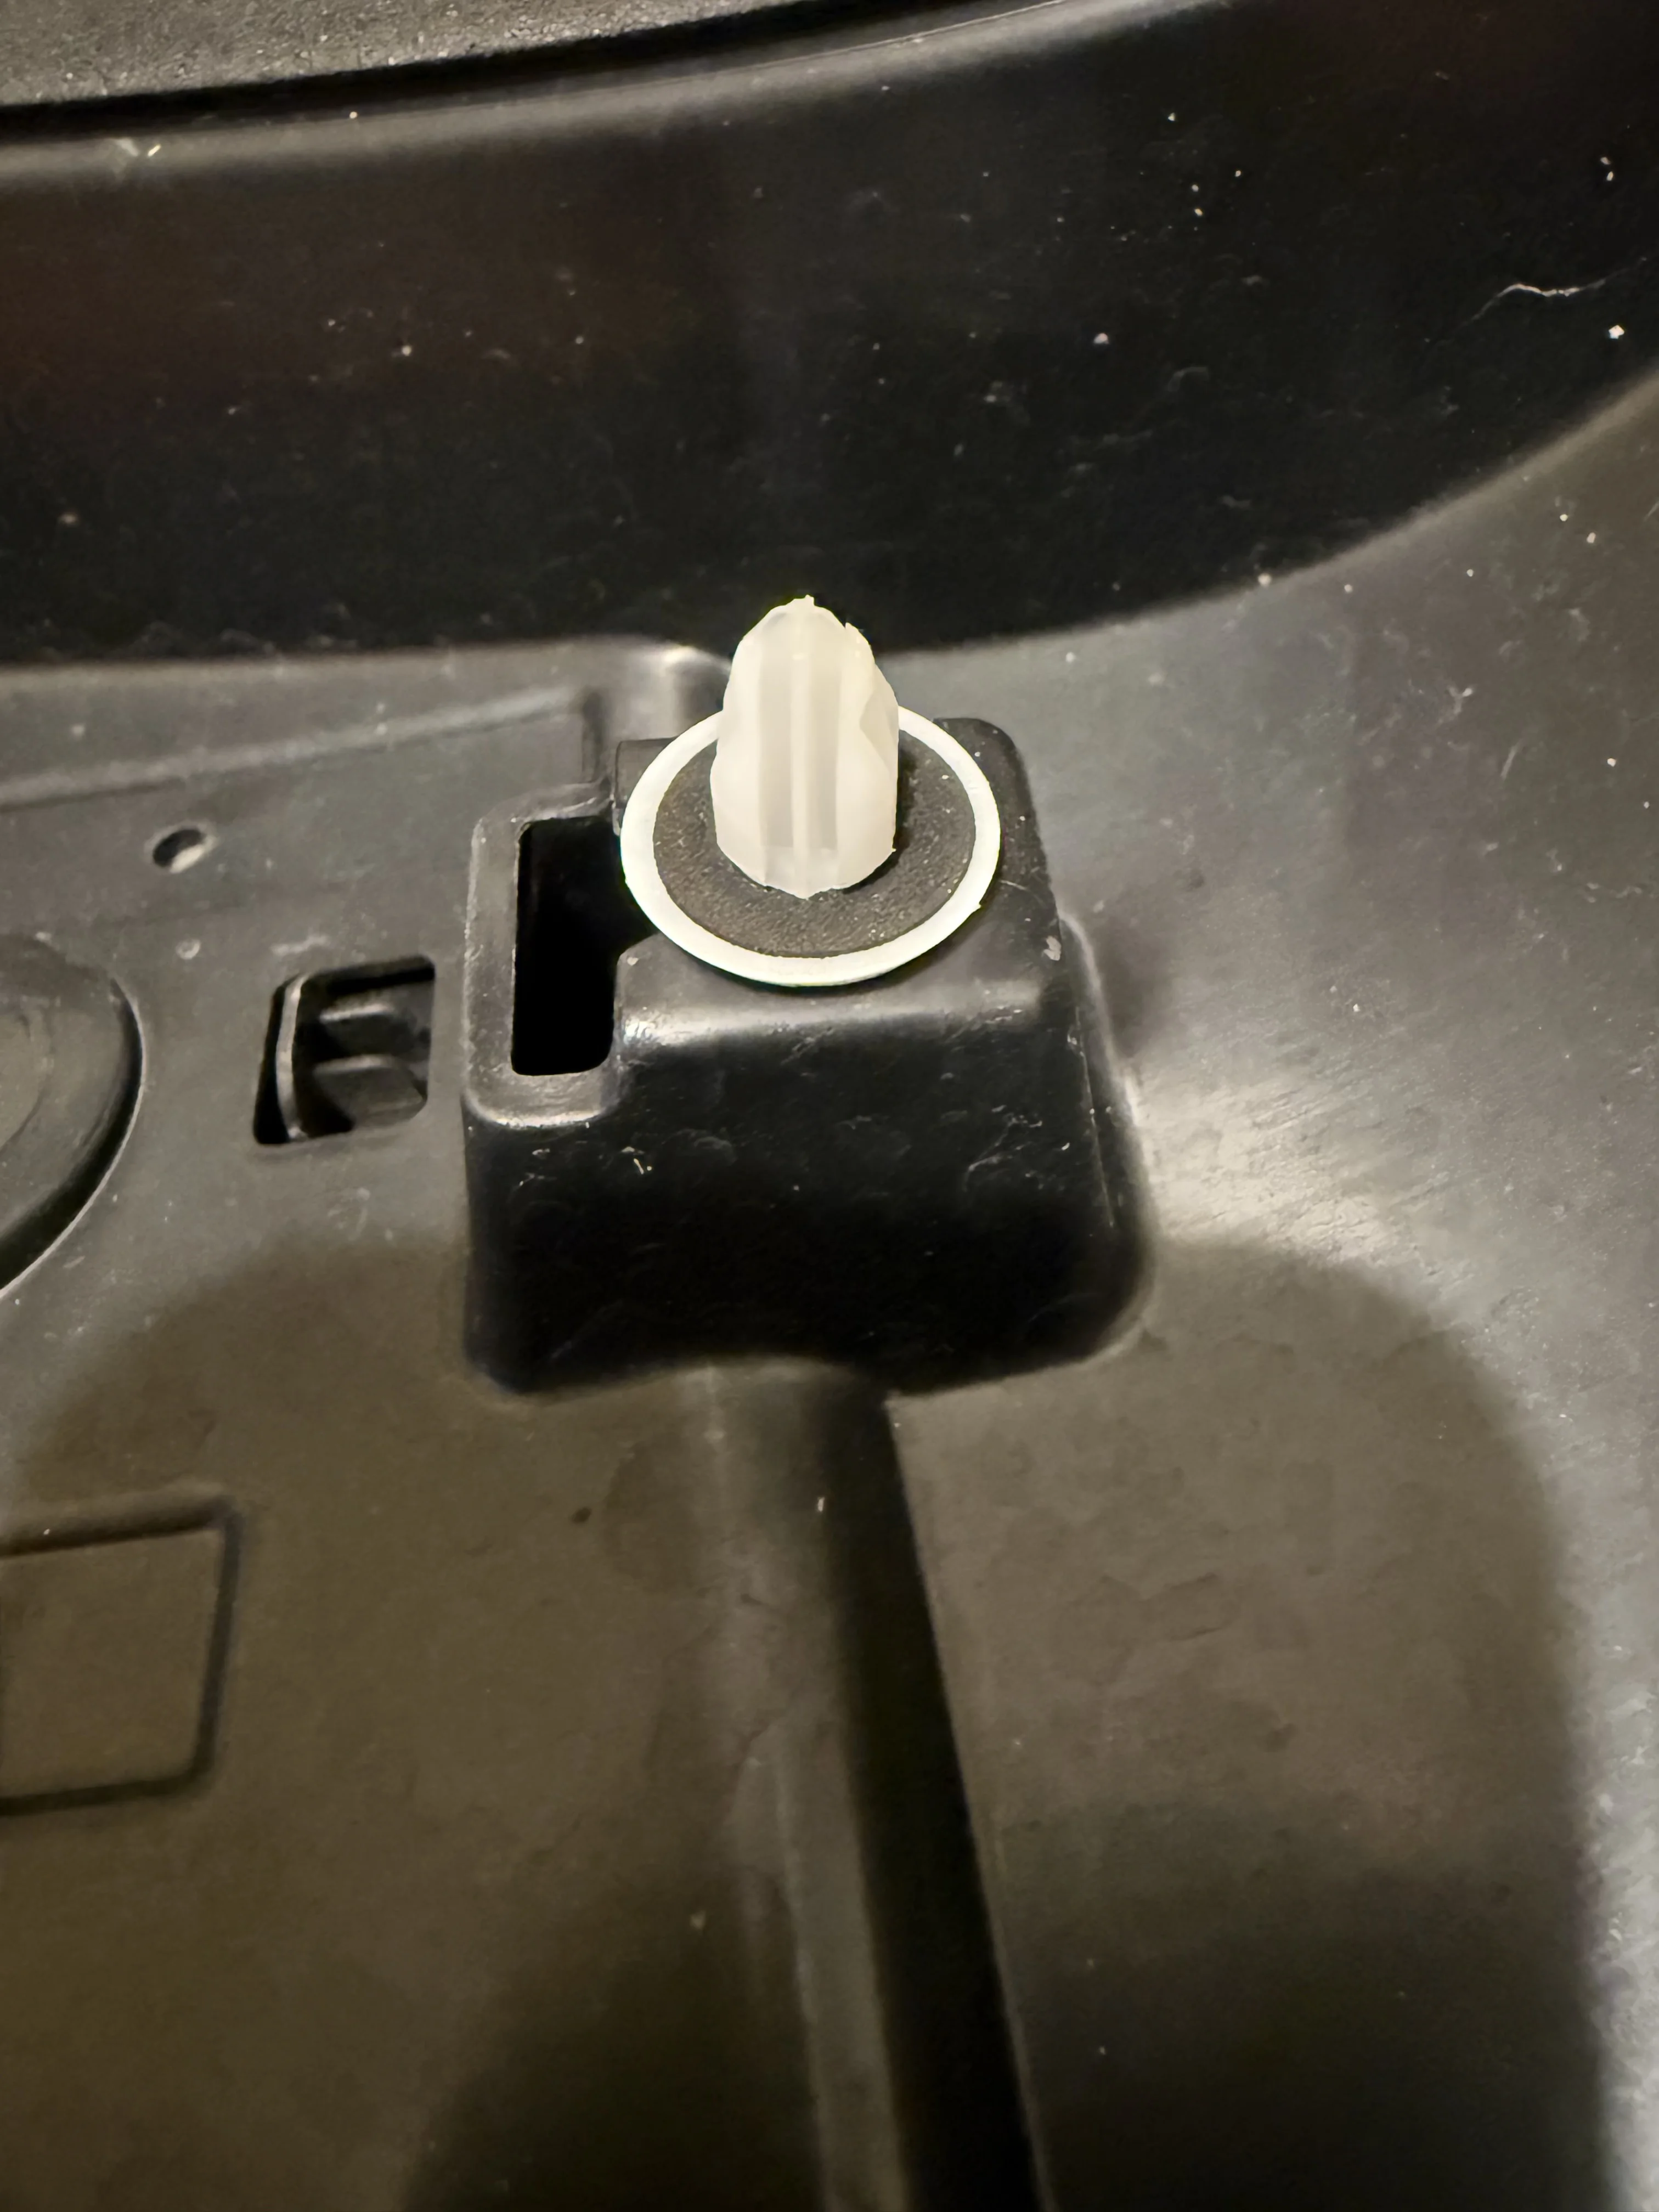
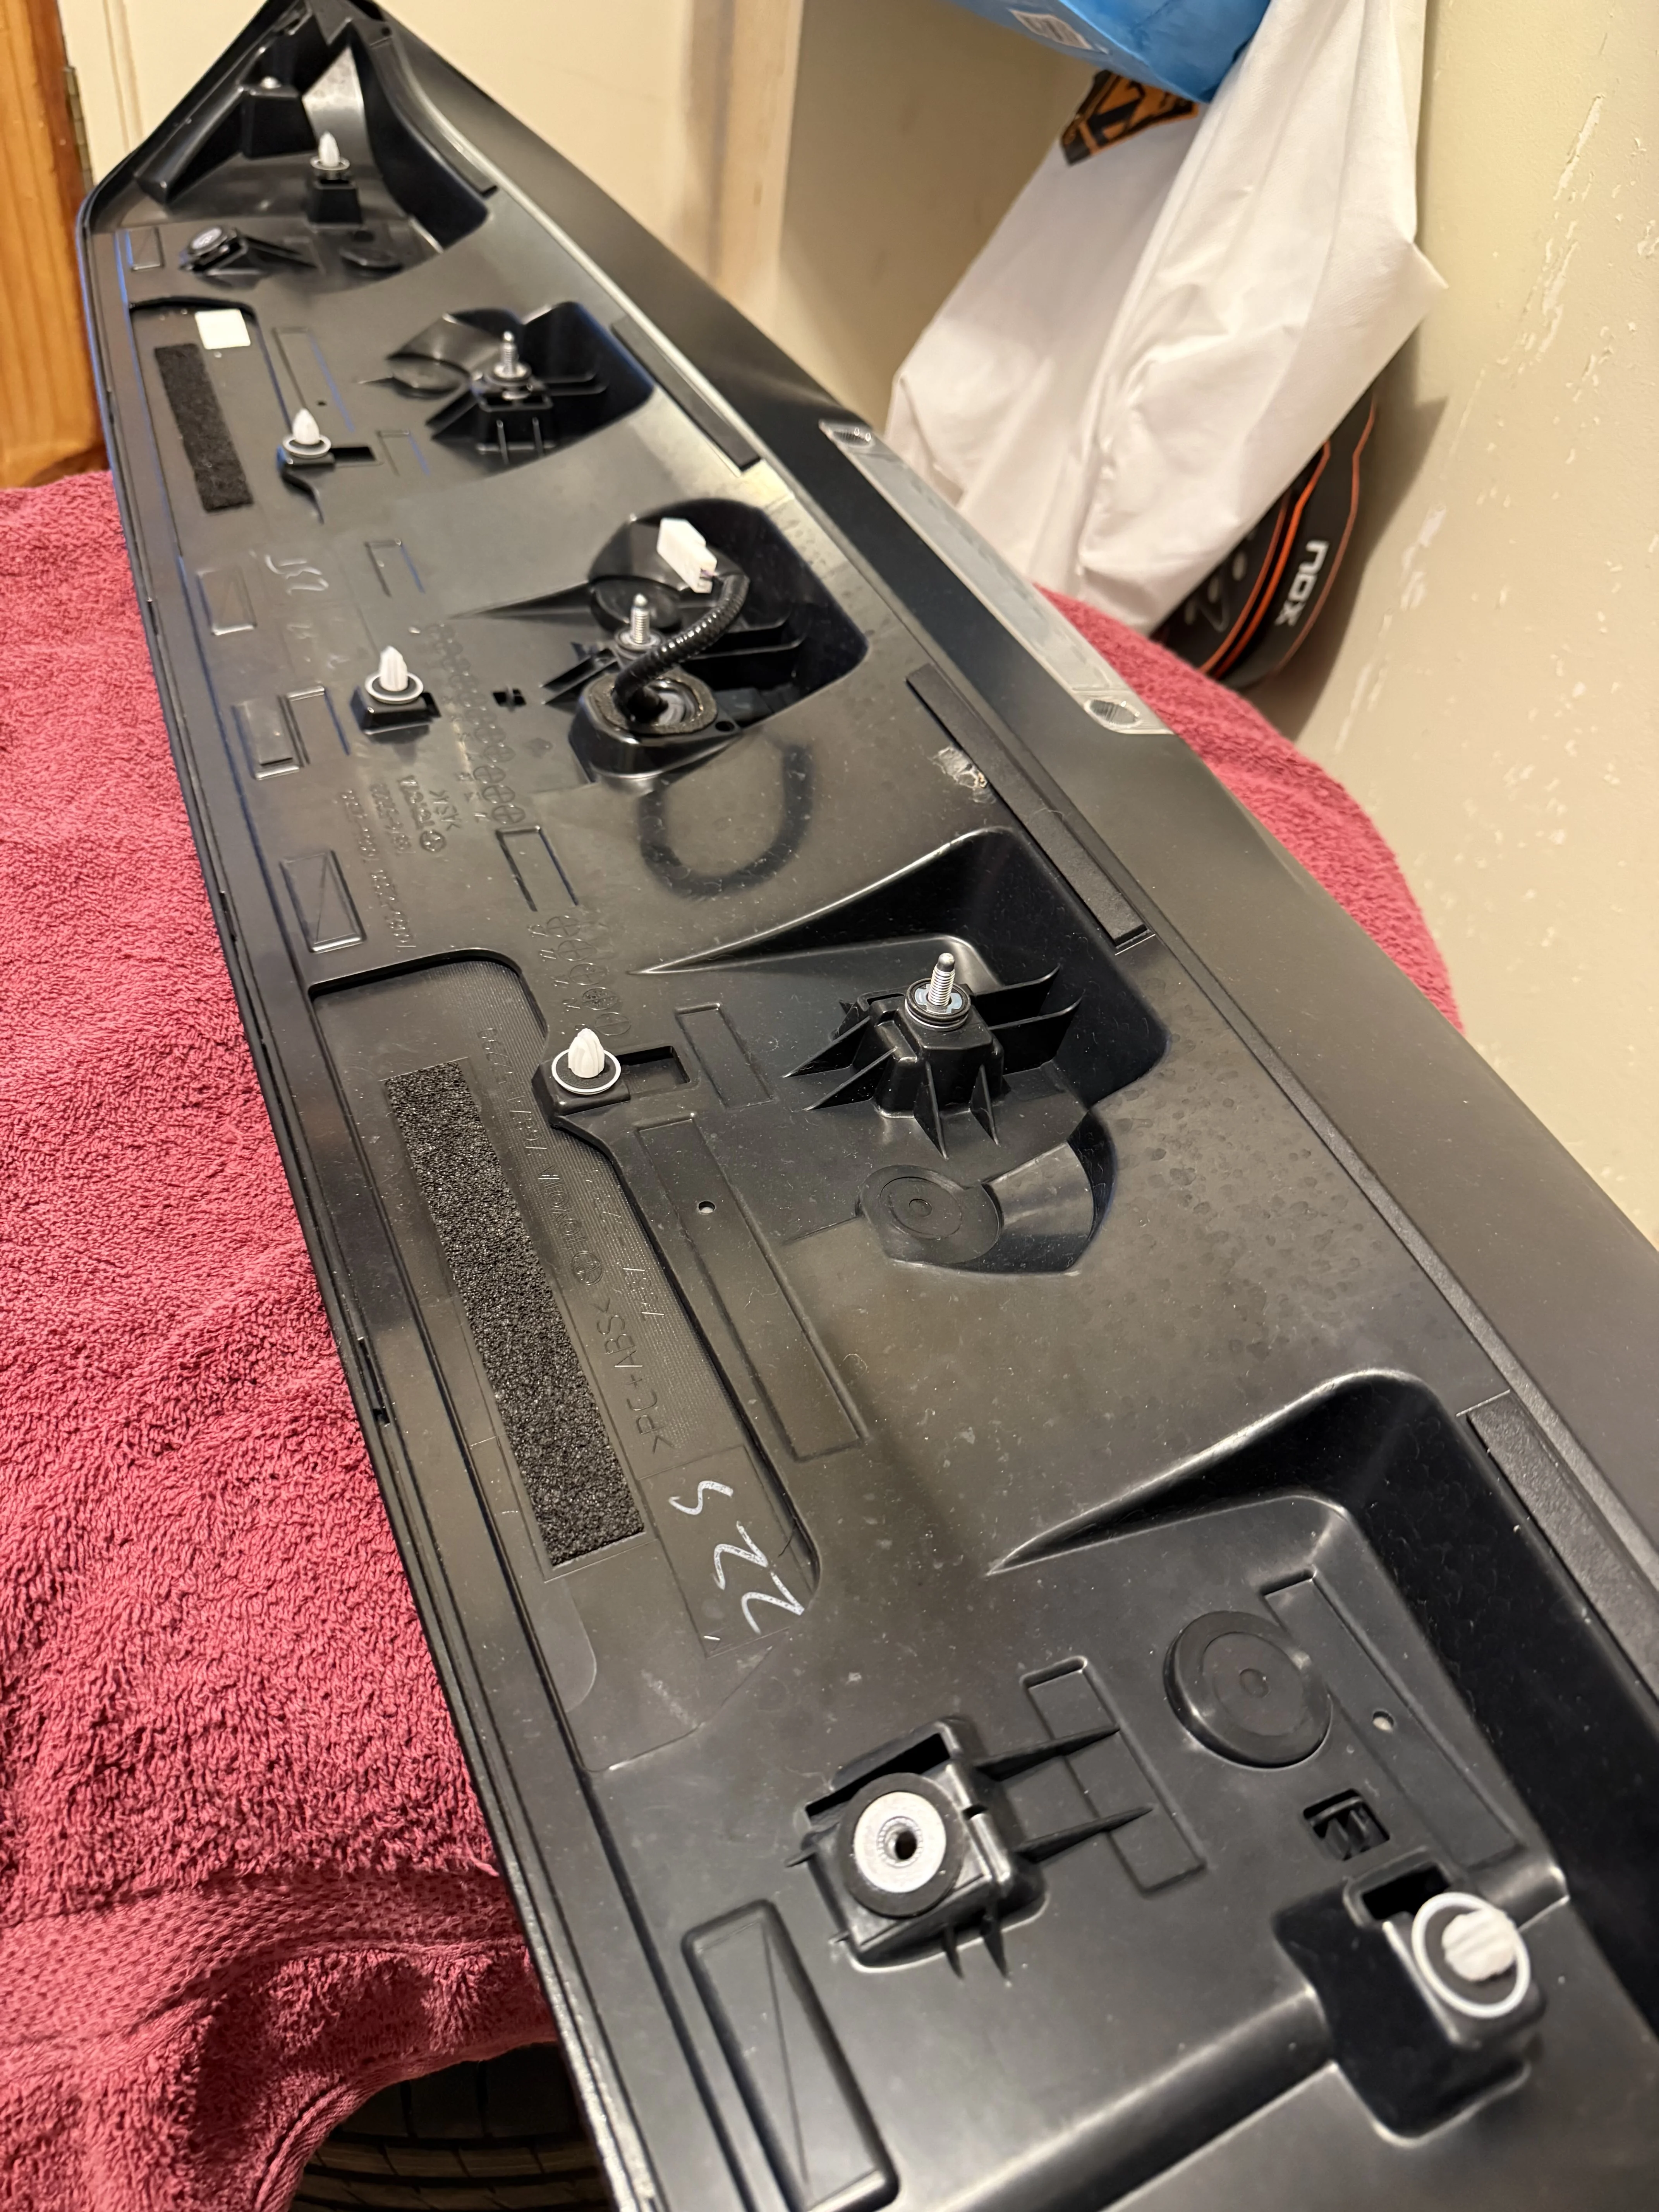
• Get your willing assistant to grab one side of the wing whilst you get the other (with the hatch/trunk shut) and try to pull the old wing upward to release it. Try & start from the outsides simultaneously, working your way inward. It takes a bit of pulling but it will release.
• The next steps are you obviously installing the new wing… I would recommend not fully locating the wing with the in-built white plastic retainer things (like in the image above) as you need to install the 2 x window brackets before you push everything down completely.
• The 2 x window brackets require 2 x M6 nuts along with some washers approximately 16-20mm in diameter. I personally used some M6 serrated washers to help lock the nuts in place but use your best judgement.
• Loosely install your window brackets & roughly line up the orientation to the positioning in relation to your clean & decontaminated glass.
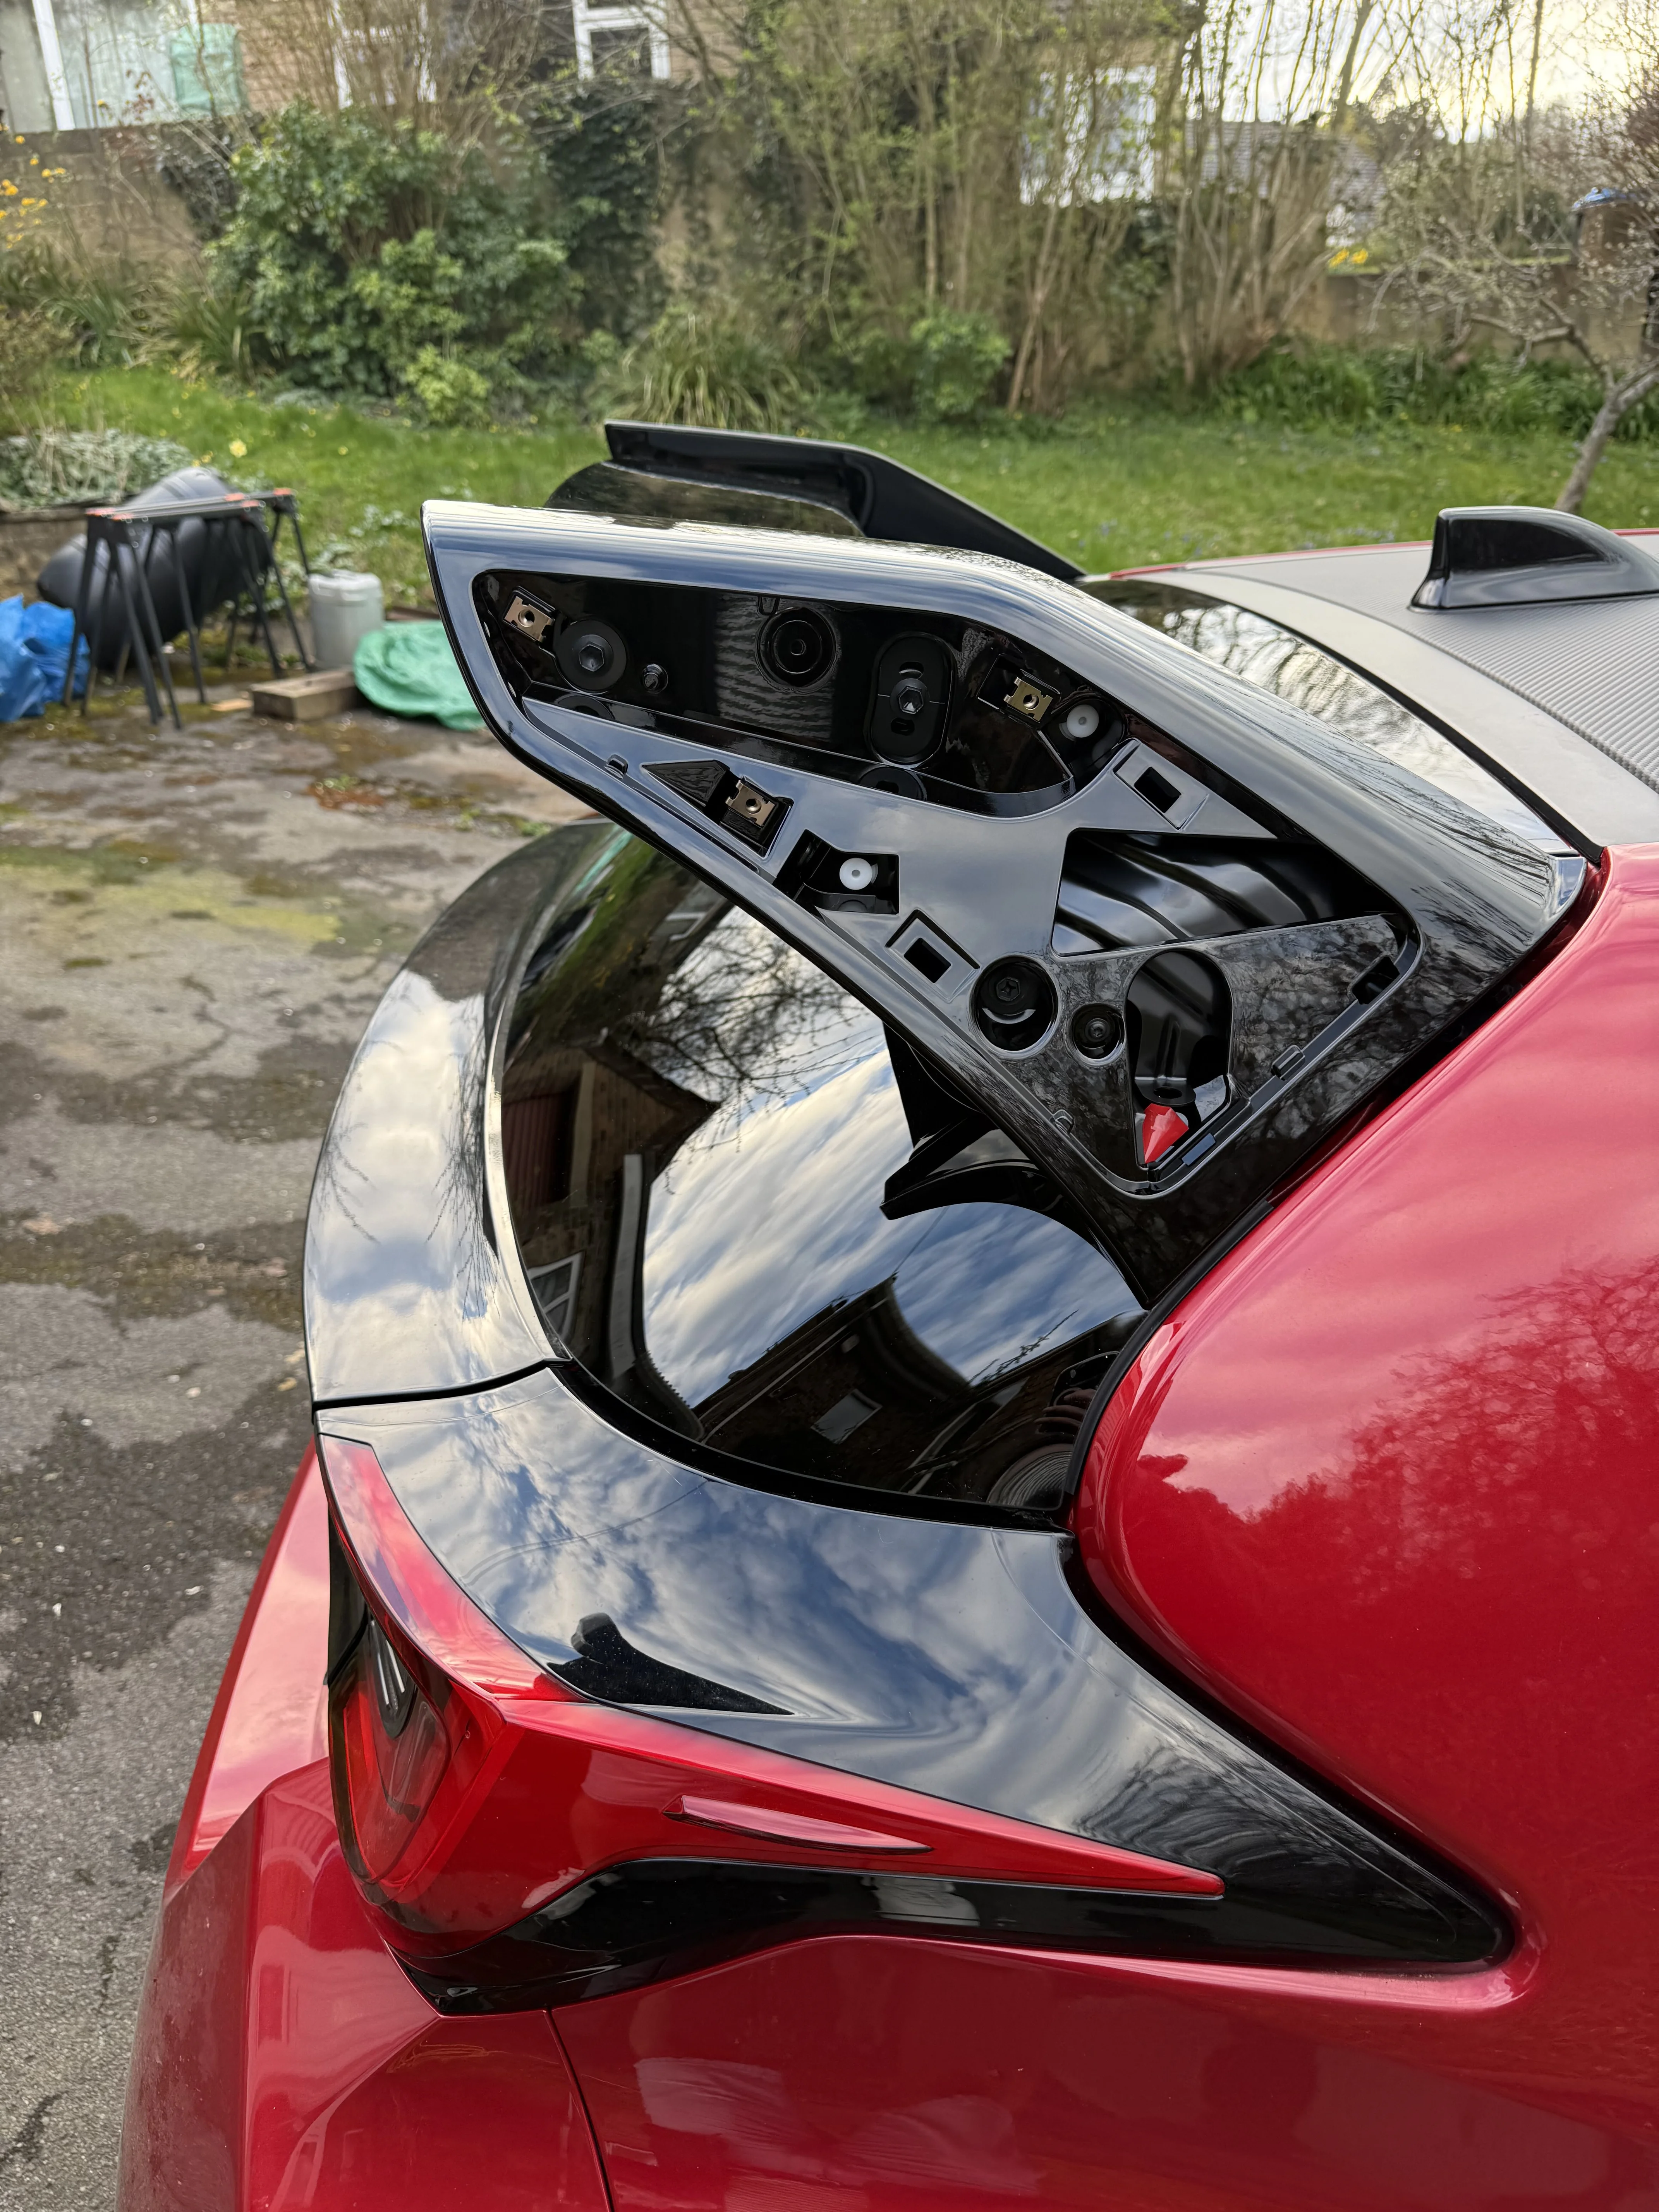
• The brackets should be ‘wedged’ between the glass & the bracket mounting points on the wing. There shouldn’t be any play/movement. These brackets are then finally placed by removing the peel-able adhesive tabs & snugging the M6 nuts. This part of the job is the most awkward part but it will become apparent as you curse in frustration.
• Re-install the nuts & bolts from earlier.
• Pop the trunk
• Remove the 4 x rubber caps/grommets
• Release the rectangular plastic plate that has the connector for the HLBL/3rd brake light.
• 3 x nuts & 2 x bolts should now be exposed. One of the nuts is located in the recess behind the rectangular plate/cover. Remove all of these carefully as to not accidentally drop them inside the skin of the hatch/door & disconnected the HLBL.
• The existing wing should still be firmly attached to the hatch/door enabling you to access the inside & outside while you work with this. There are 5 x white plastic locators/retainers along the width of the wing keeping it located in place -
• Get your willing assistant to grab one side of the wing whilst you get the other (with the hatch/trunk shut) and try to pull the old wing upward to release it. Try & start from the outsides simultaneously, working your way inward. It takes a bit of pulling but it will release.
• The next steps are you obviously installing the new wing… I would recommend not fully locating the wing with the in-built white plastic retainer things (like in the image above) as you need to install the 2 x window brackets before you push everything down completely.
• The 2 x window brackets require 2 x M6 nuts along with some washers approximately 16-20mm in diameter. I personally used some M6 serrated washers to help lock the nuts in place but use your best judgement.
• Loosely install your window brackets & roughly line up the orientation to the positioning in relation to your clean & decontaminated glass.
• The brackets should be ‘wedged’ between the glass & the bracket mounting points on the wing. There shouldn’t be any play/movement. These brackets are then finally placed by removing the peel-able adhesive tabs & snugging the M6 nuts. This part of the job is the most awkward part but it will become apparent as you curse in frustration.
• Re-install the nuts & bolts from earlier.
Last edited:

TheManWithTheStick
Totally Hooked
Brilliant timing  I'm doing mine this weekend
Did you say you had to buy the M6 nuts yourself @GRavy_Baby?
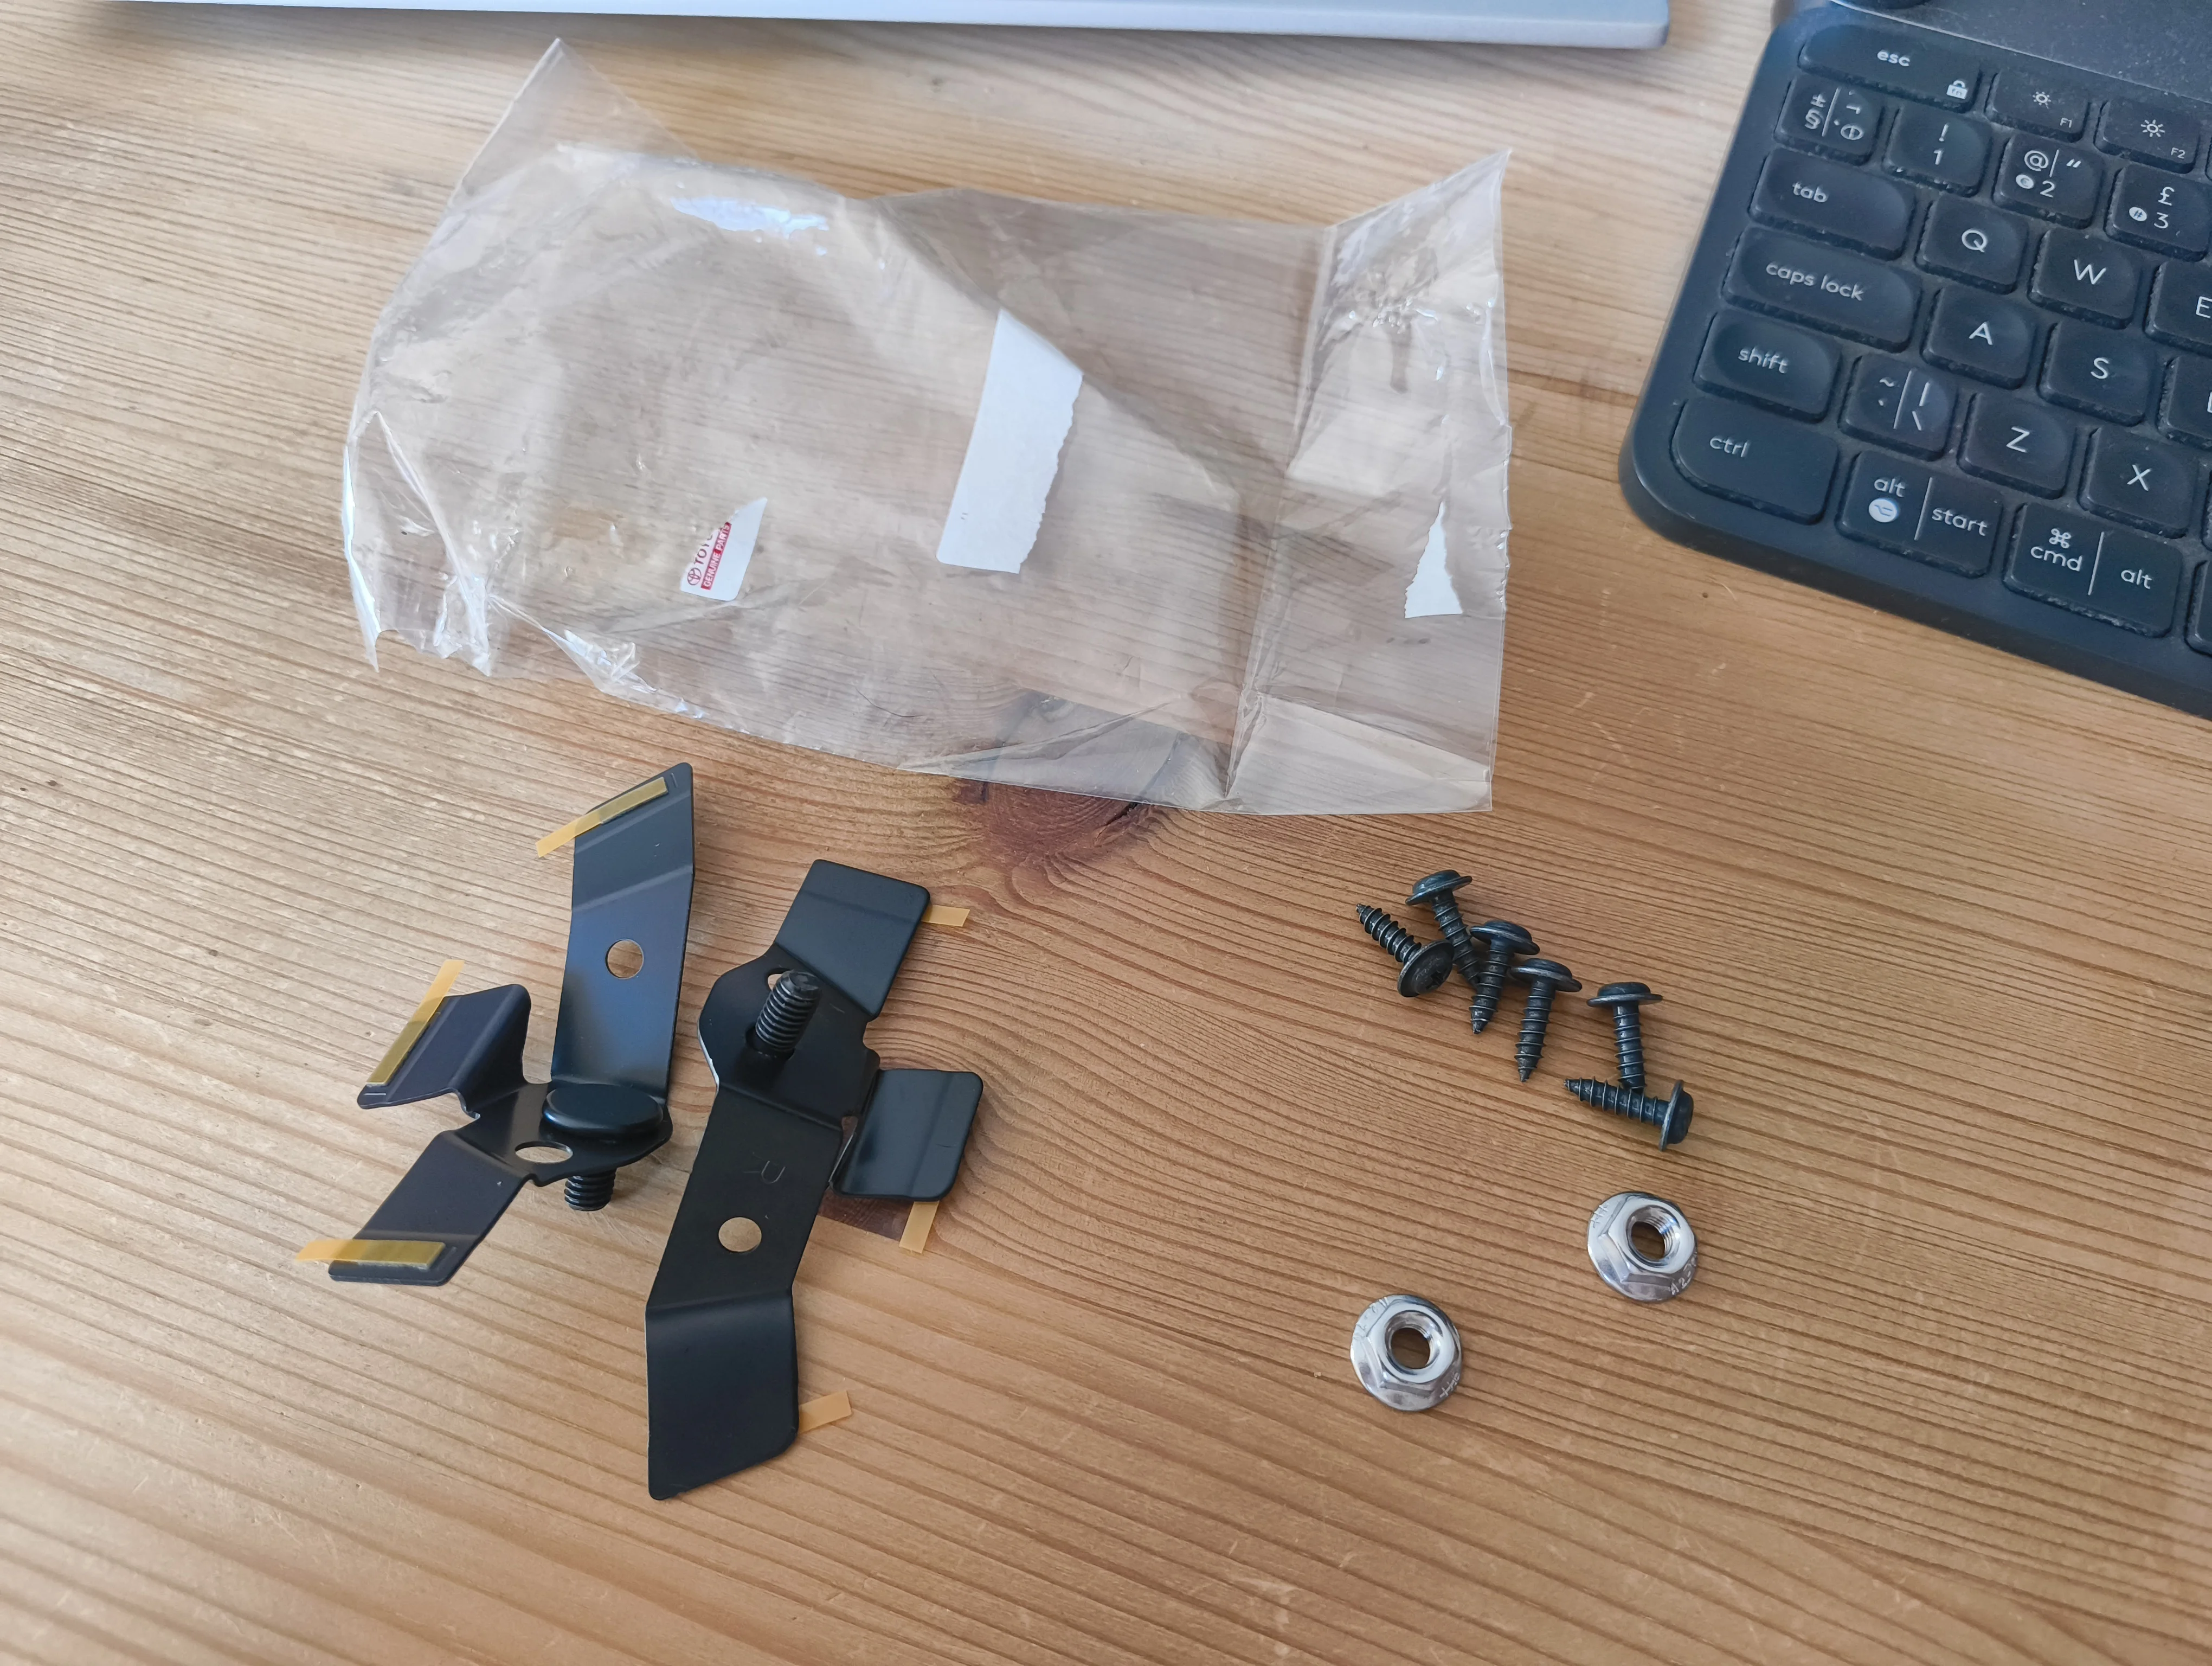
I'm just wondering if I have everything I need, when the brackets arrived the (already opened) package contained 2 nuts along with 6 screws so I'm hoping this is everything. Can you confirm either way? Ta
I'm doing mine this weekendDid you say you had to buy the M6 nuts yourself @GRavy_Baby?
I'm just wondering if I have everything I need, when the brackets arrived the (already opened) package contained 2 nuts along with 6 screws so I'm hoping this is everything. Can you confirm either way? Ta
Last edited:
GRavy_Baby
Obsessed member
My brackets didn’t come with the nuts so it looks like you’re set! The ones you have look flanged which is great. The bracket mounting points on the new wing have a larger holes than the M6 studs on the brackets for precise adjustment. You got all of the screws too, enjoy fitting it this weekend mateBrilliant timing
Did you say you had to buy the M6 nuts yourself @GRavy_Baby?
I'm just wondering if I have everything I need, when the brackets arrived the (already opened) package contained 2 nuts along with 6 screws so I'm hoping this is everything. Can you confirm either way? Ta
View attachment 40821

GRavy_Baby
Obsessed member
A tip I forgot to add -
The 3 x threaded studs on the wing are quite sharp & could easily mark the paint accidentally. I’d recommend using a bit of insulation tape or vacuum caps for temporary protection when positioning. Especially if you’re going solo at it.
Its shape is clumsy & awkward. Can’t be too careful!
The 3 x threaded studs on the wing are quite sharp & could easily mark the paint accidentally. I’d recommend using a bit of insulation tape or vacuum caps for temporary protection when positioning. Especially if you’re going solo at it.
Its shape is clumsy & awkward. Can’t be too careful!
HI¡Brilliant timing
Did you say you had to buy the M6 nuts yourself @GRavy_Baby?
I'm just wondering if I have everything I need, when the brackets arrived the (already opened) package contained 2 nuts along with 6 screws so I'm hoping this is everything. Can you confirm either way? Ta
View attachment 40821
Can you say me the size (thickness and length
)of this screws.I have the rear wing, but I don't have received the screws for the side covers .I think that are the same of this photo
Regards
GRavy_Baby
Obsessed member
Part number for the screws :HI¡
Can you say me the size (thickness and length
)of this screws.I have the rear wing, but I don't have received the screws for the side covers .I think that are the same of this photo
Regards
93560-54014
regardsPart number for the screws :
93560-54014
TheManWithTheStick
Totally Hooked
 I don't care about max speed
Hi,Hi,
I just bought the Aero Kit spoiler for my Gr mk II.
Does anyone have the assembly instructions?
There are 2 racket e 6 screws.
Help me
grazie
As I just got my Yaris Gen2 & love to have this new Aero Kit spoiler. Could you please share whereabouts you order from ?
Thanks
- Thread starter
- #11

Whifbitz | High-Performance Tuning Garage & Car Parts Supply
Whifbitz is the UK’s leading car tuning garage and performance parts supplier. Specialising in JDM and European cars, we deliver expert tuning and fitting.
 www.garagewhifbitz.co.uk
It's the best site for our Toyota GR.

hierros
Absorbed member
- May 17, 2022
- 37
- 35
I just got the spoiler from them and one of the "ears" got damaged in transitWhifbitz | High-Performance Tuning Garage & Car Parts Supply
Whifbitz is the UK’s leading car tuning garage and performance parts supplier. Specialising in JDM and European cars, we deliver expert tuning and fitting.
It's the best site for our Toyota GR.
 Lets see how it develops.
Also, I think mine did not come with the side "GR-Four" covers? I only did a quick revision on the pieces for damages but I dont think Ive seen those...
GRavy_Baby
Obsessed member
Email them before 6am (GMT) tomorrow requesting Paul with what’s missing. That seems to be what time he’s in sat in front of his computer with a coffee. I was missing my covers and a couple of screws (which you should have 6x of).I just got the spoiler from them and one of the "ears" got damaged in transit
Also, I think mine did not come with the side "GR-Four" covers? I only did a quick revision on the pieces for damages but I dont think Ive seen those...
Any pictures of the damage?
hierros
Absorbed member
- May 17, 2022
- 37
- 35
Yeah I already mailed them. Now that you say so i think the screws are missing too! I only have the glass-mounting pieces.Email them before 6am (GMT) tomorrow requesting Paul with what’s missing. That seems to be what time he’s in sat in front of his computer with a coffee. I was missing my covers and a couple of screws (which you should have 6x of).
Any pictures of the damage?
Images of the damaged part:
GRavy_Baby
Obsessed member
A warehouse with chimpanzee operatives. He has cameras in the warehouse overseeing the logistics of the Whifbitz operation. Tag the photos in another email if you haven’t already. Mine arrived in a box that would’ve survived being thrown out of a aeroplane so I’m not sure how your wing has sustained such damage… unless it’s a return or damaged during packing/unpacking. Keep us postedView attachment 41464
Its not huge but its definitely noticeable and I paid for a new piece... The cover thing has me in shock, how could they forget to add them? hahahaha
hierros
Absorbed member
- May 17, 2022
- 37
- 35
This was the box it was sent in... It had 2 rods inside making an X and some lose paper to avoid scratches... That obviously seems like didnt work.A warehouse with chimpanzee operatives. He has cameras in the warehouse overseeing the logistics of the Whifbitz operation. Tag the photos in another email if you haven’t already. Mine arrived in a box that would’ve survived being thrown out of a aeroplane so I’m not sure how your wing has sustained such damage… unless it’s a return or damaged during packing/unpacking. Keep us posted

tubbytommy
New member
- Jun 28, 2026
- 4
- 5
I got mine from whifbitz, no problems ,quick arrival and all parts included even window brackets.
15 mins to fit. Only thing id recommend is a 25mm blanking gromett for where the rear brake light cable goes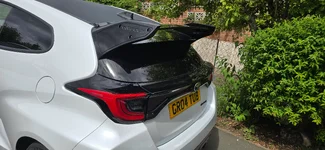
15 mins to fit. Only thing id recommend is a 25mm blanking gromett for where the rear brake light cable goes
Hi, any concern on the brackets fittings ?I got mine from whifbitz, no problems ,quick arrival and all parts included even window brackets.
15 mins to fit. Only thing id recommend is a 25mm blanking gromett for where the rear brake light cable goesView attachment 41758
