With two of you, this will be quite easy -
• Pop the trunk
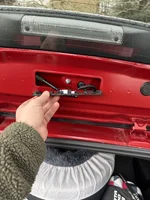
• Remove the 4 x rubber caps/grommets
• Release the rectangular plastic plate that has the connector for the HLBL/3rd brake light.
• 3 x nuts & 2 x bolts should now be exposed. One of the nuts is located in the recess behind the rectangular plate/cover. Remove all of these carefully as to not accidentally drop them inside the skin of the hatch/door & disconnected the HLBL.
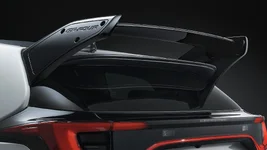
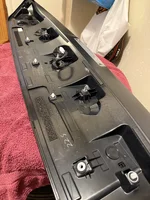
• The existing wing should still be firmly attached to the hatch/door enabling you to access the inside & outside while you work with this. There are 5 x white plastic locators/retainers along the width of the wing keeping it located in place -
• Get your willing assistant to grab one side of the wing whilst you get the other (with the hatch/trunk shut) and try to pull the old wing upward to release it. Try & start from the outsides simultaneously, working your way inward. It takes a bit of pulling but it will release.
• The next steps are you obviously installing the new wing… I would recommend not fully locating the wing with the in-built white plastic retainer things (like in the image above) as you need to install the 2 x window brackets before you push everything down completely.
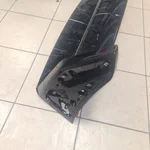
• The 2 x window brackets require 2 x M6 nuts along with some washers approximately 16-20mm in diameter. I personally used some M6 serrated washers to help lock the nuts in place but use your best judgement.
• Loosely install your window brackets & roughly line up the orientation to the positioning in relation to your clean & decontaminated glass.
• The brackets should be ‘wedged’ between the glass & the bracket mounting points on the wing. There shouldn’t be any play/movement. These brackets are then finally placed by removing the peel-able adhesive tabs & snugging the M6 nuts. This part of the job is the most awkward part but it will become apparent as you curse in frustration.
• Re-install the nuts & bolts from earlier.