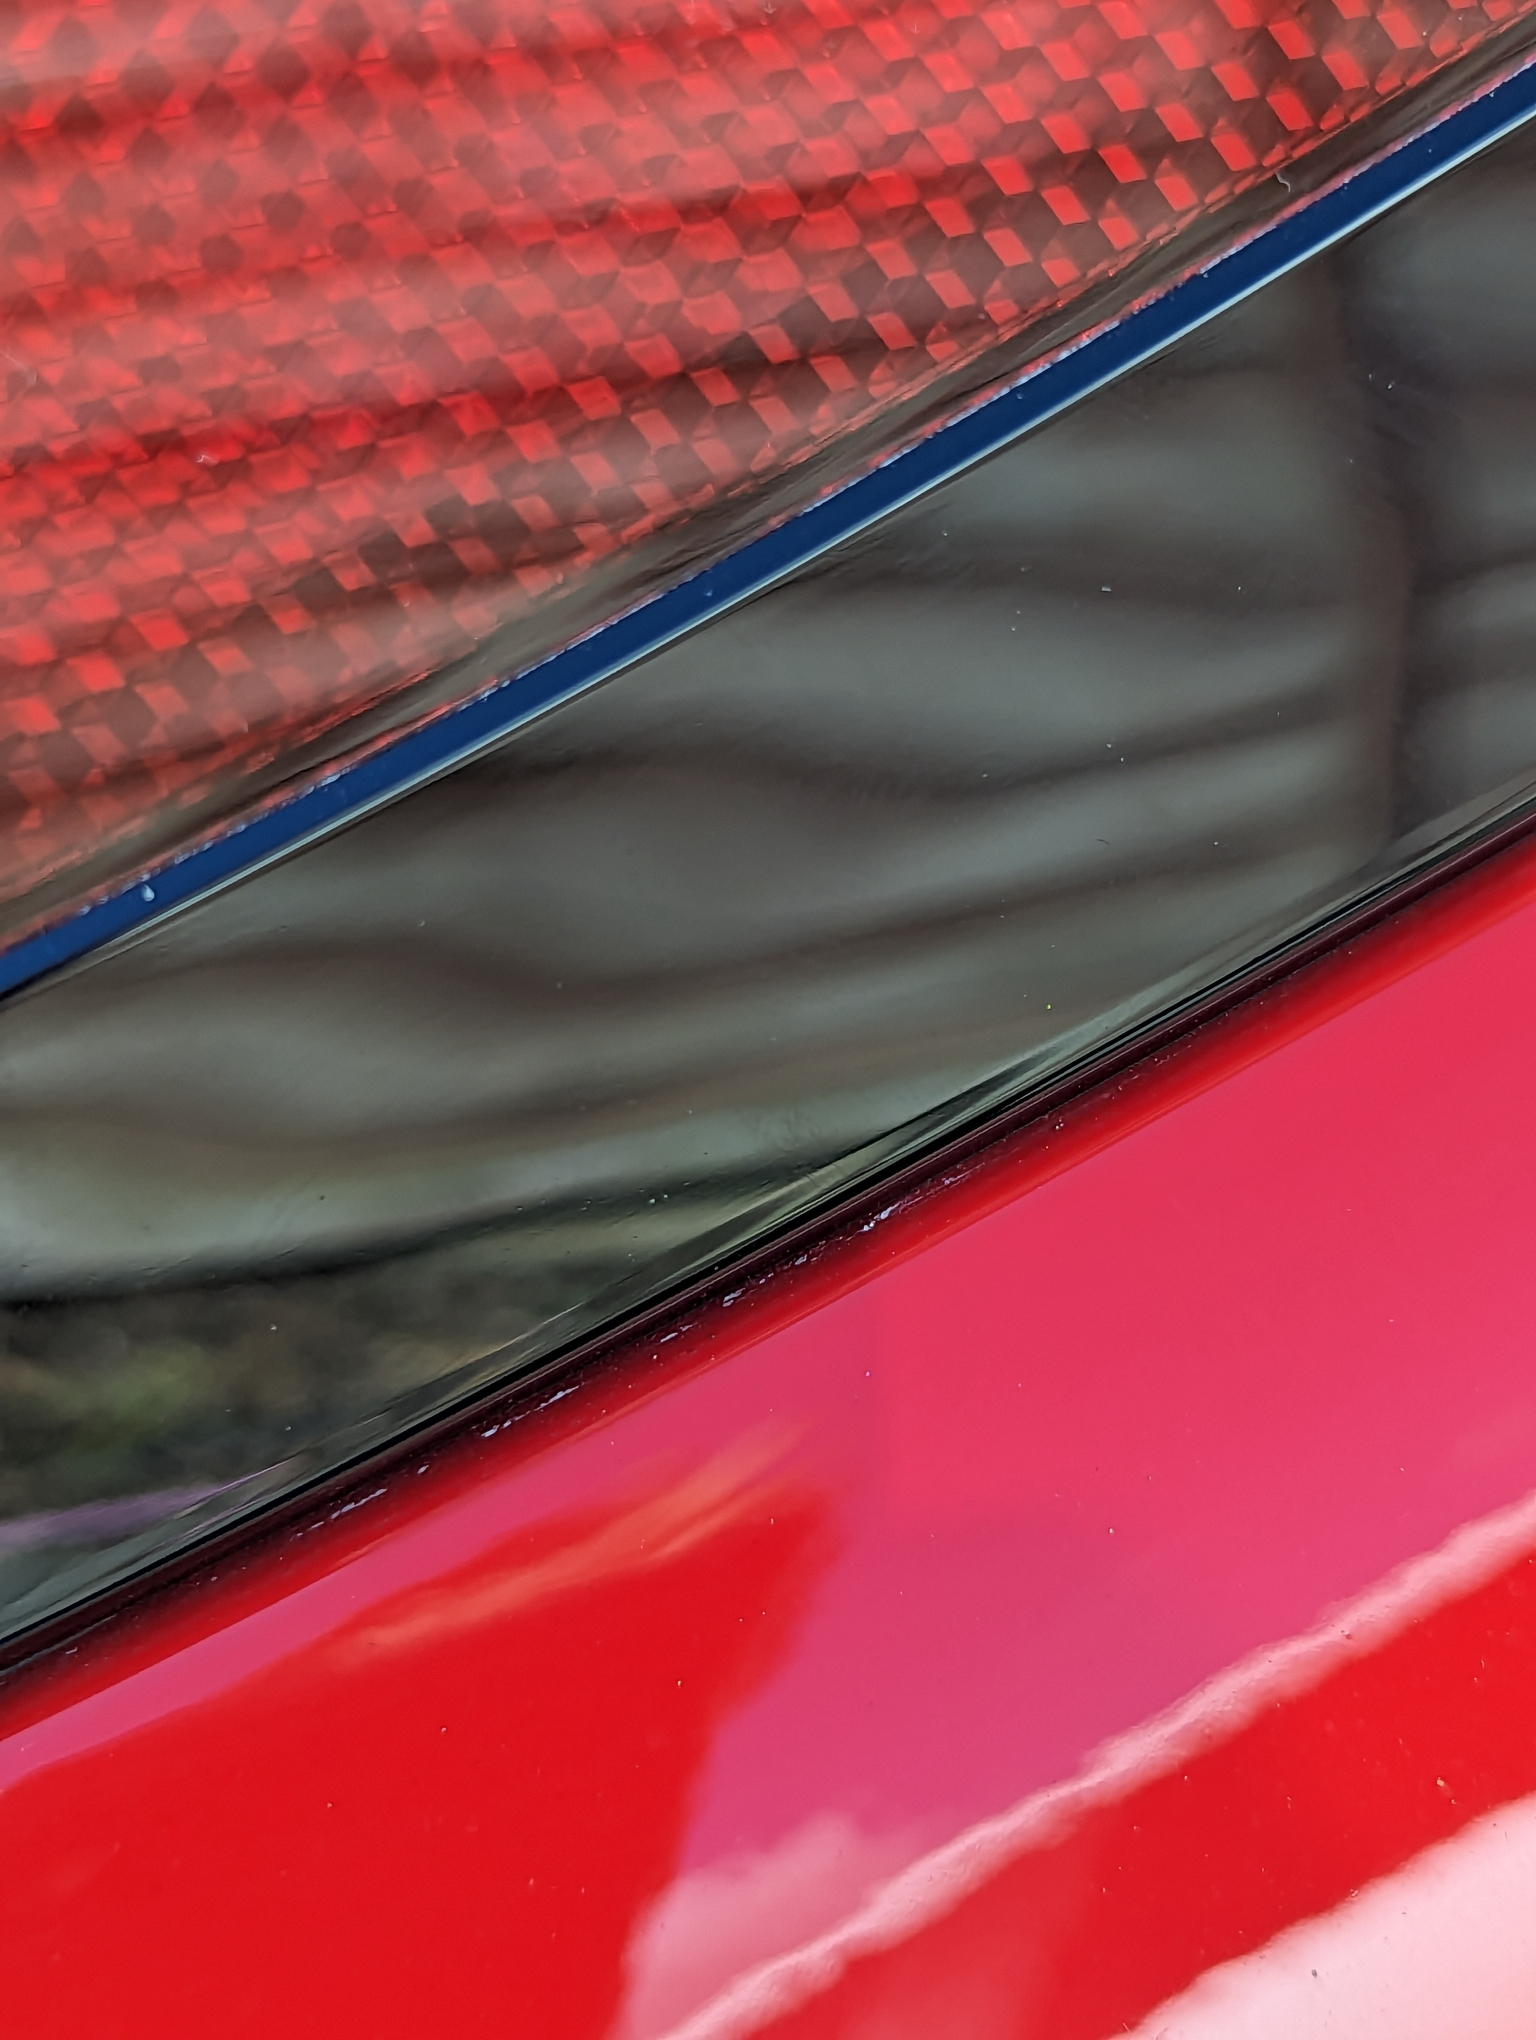
GR86 Tail light interference with body work. Check yours!

ZN8

Administrator
Staff member
Joined
Dec 29, 2021
Messages
2,126
Reaction score
3,832
Location
Kent
Hi folks


When I filled up today I noticed a chip in the paint where the light meets the bodywork on the driver's side. Turns out the light is fretting against the bodywork damaging the paint. I loosened the bolts holding the light in place to see if it was interfering anywhere else and it had, both along the top edge and where it meets the bumper.
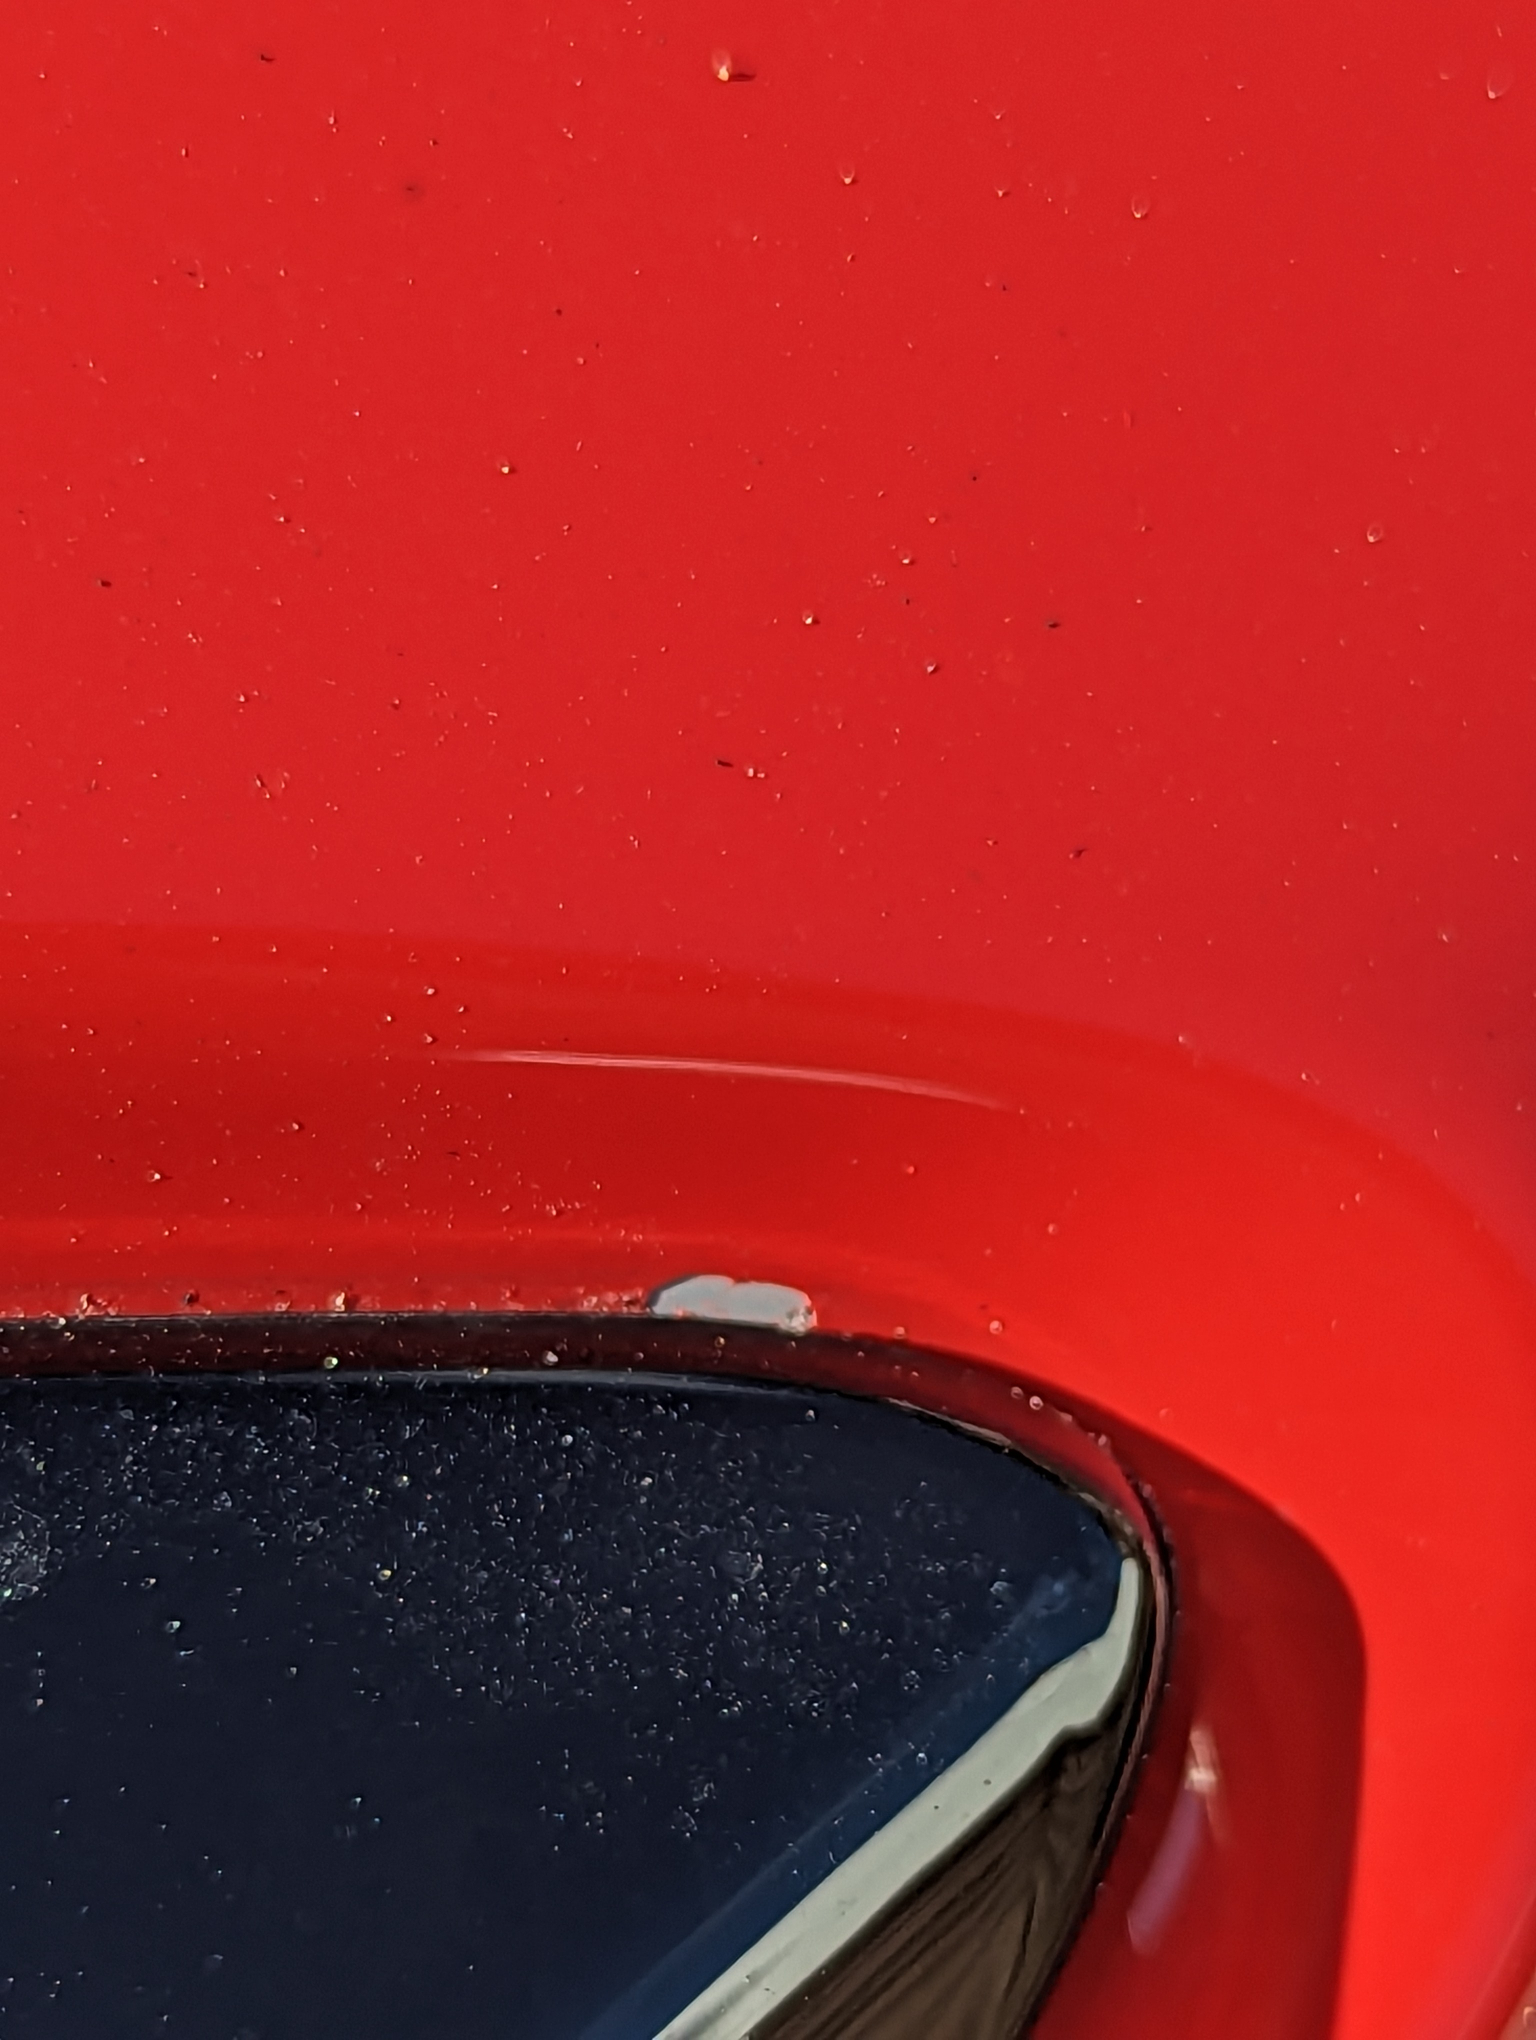
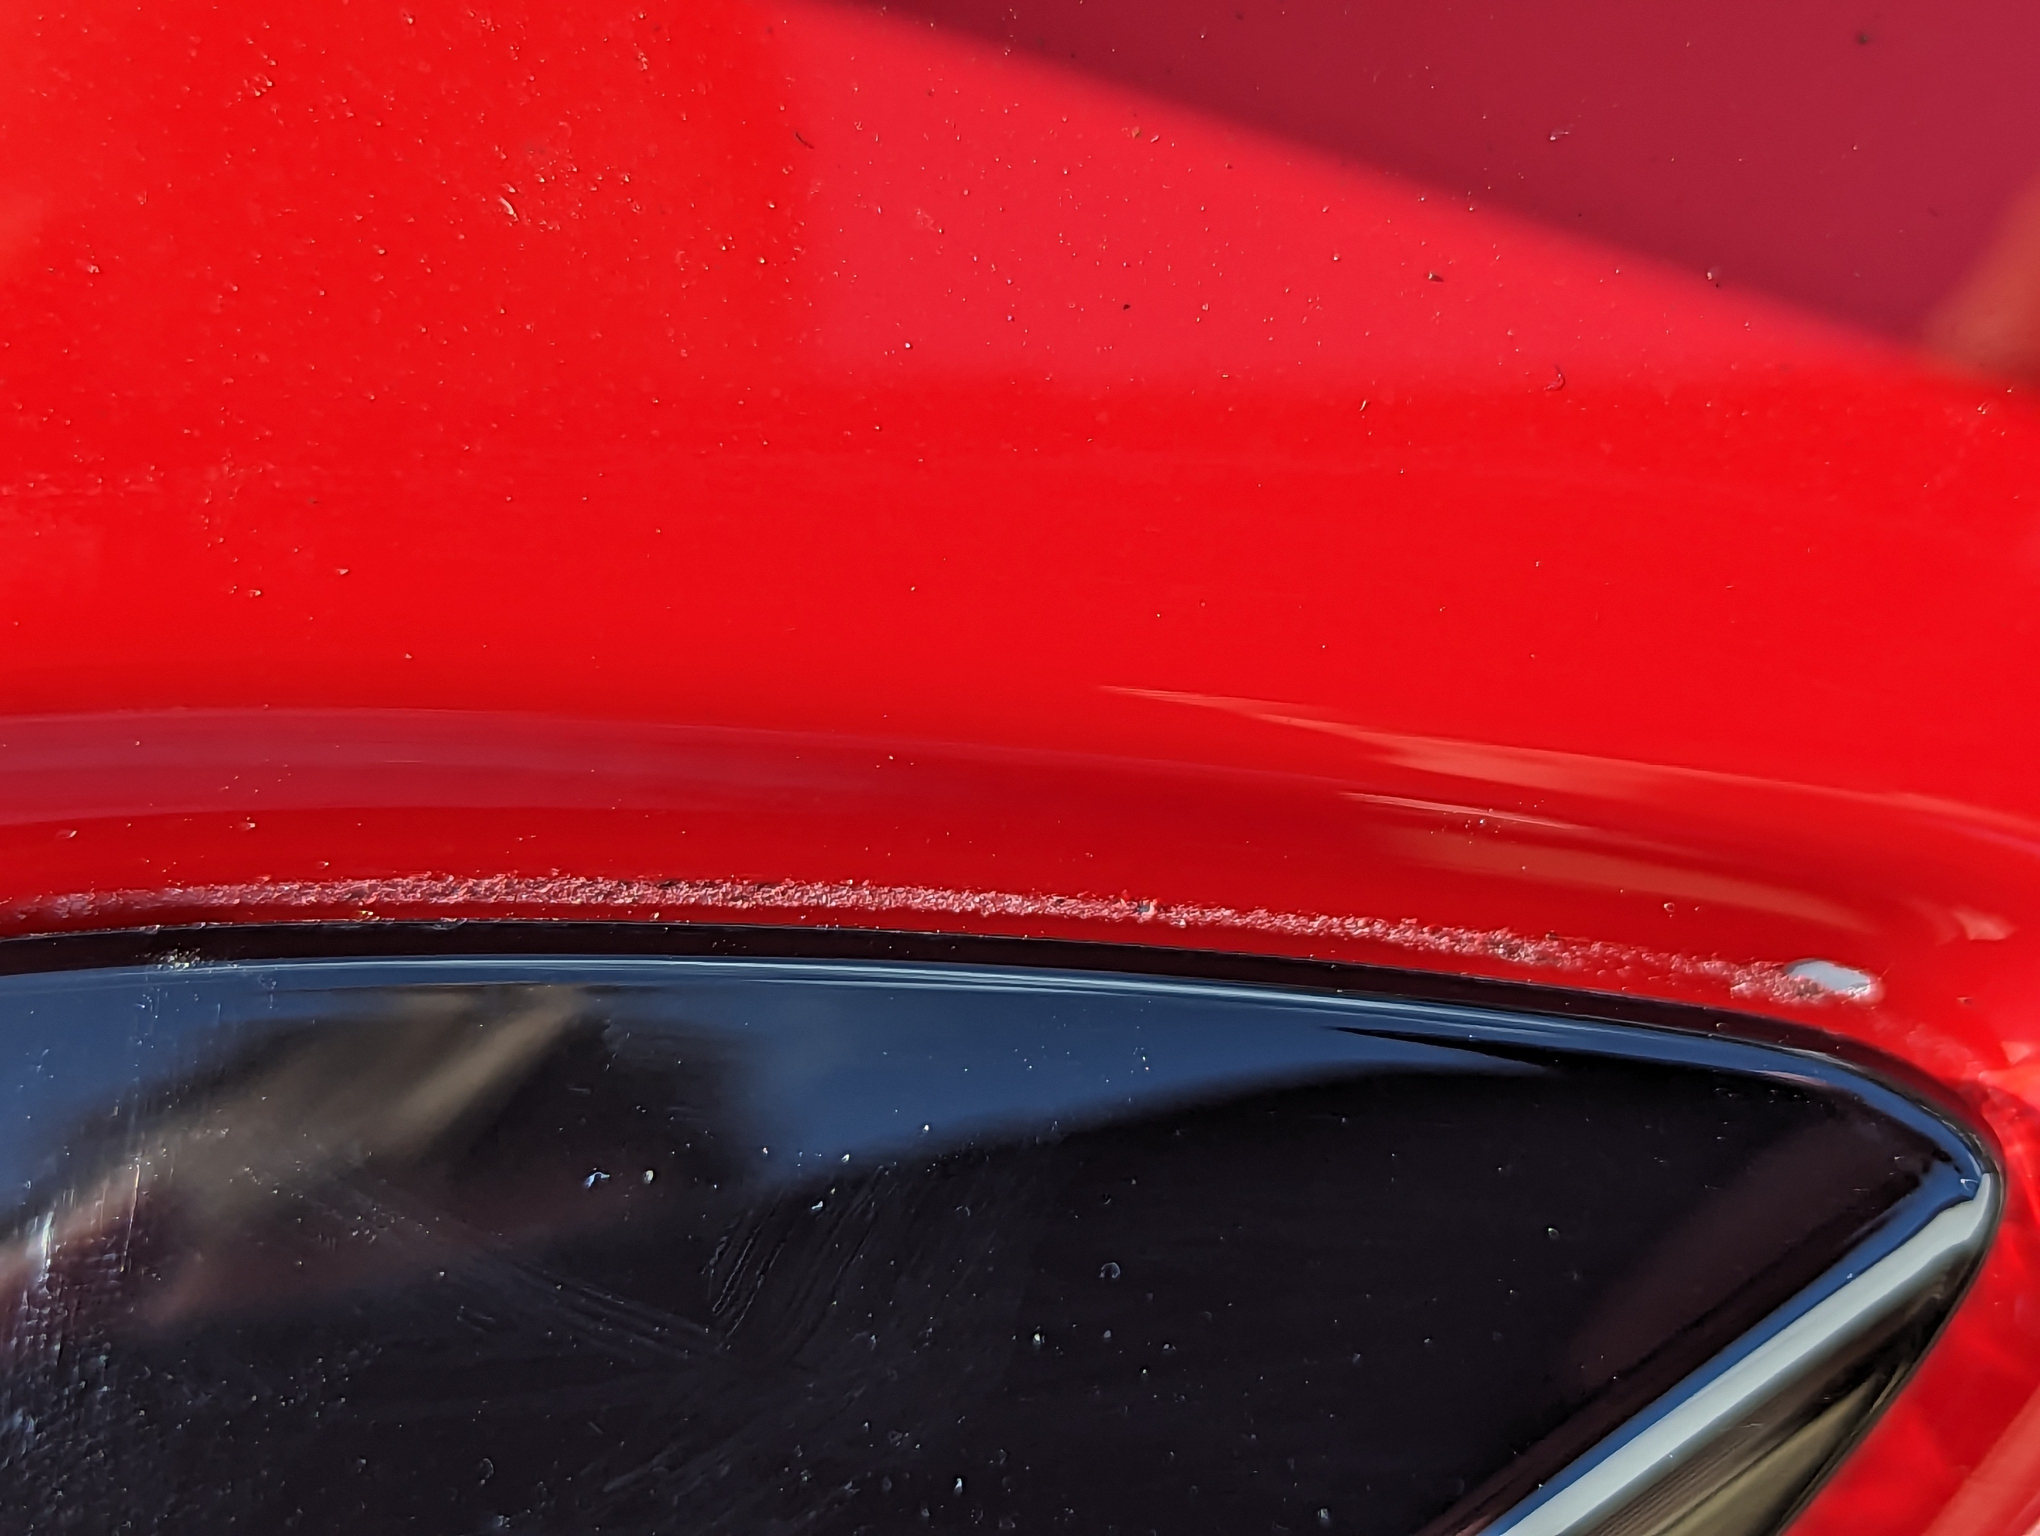
PXL_20230923_101547449.webp

PXL_20230923_103621187.webp

PXL_20230923_104206791.webp


I remember reading about this very early on in late 2021, it's become a well documented issue in Japan. Unfortunately It's not really been picked up over here or the state's probably due to it being lost in translation. Whilst I wait for touch up paint i've loosened and repositioned the light to prevent it making contact at the top but I will have to put some sort of packing somewhere along the bottom edge as the clearance is still too small. I would recommend you check your lights!
 
Oh! I posted it about it here a couple of months ago. When I was washing the car, not long after having it back from the dealer for the parking sensor fitting, I noticed there was some scratching along the top of the bumper right under the tail light. I assumed that the dealer had done it when refitting the bumper, but perhaps I was doing them a bit of a disservice. Mine was on the passenger side though....I'll see if I can get a picture in a bit.
 
Just checked. Same issue with mine. Passenger side only has marks along the bottom of the light, which is what I knew about. Top looks fine:

PXL_20230923_163657996.jpg

PXL_20230923_163712462.jpg


Checked my driver's side, and I have a chip on exactly the same spot as you, and a tiny mark below the light near the panel gap:

PXL_20230923_163726074.jpg

PXL_20230923_163750079.jpg


Annoying but hopefully some touch up paint will render it invisible. How much did you loosen the light? The gap at the moment is probably about 1-2mm so that's quite a bit of movement to cause contact.
 
I backed the screws all the way out and gave the light a wiggle so that it was loose I then retightened the screws holding the light where I wanted it. It didn't move by much but enough to get it away from the paint. My gap on the driver's side was about 1mm, passenger side fitment is perfect. The light is dead easy to get out when it comes to it, pop the little cover off between the light and bootlid which exposes 2 screws, removing them and the 1 at the top is all that holds it in, there is 1 clip holding it in which just requires you pulling on the light.

PXL_20230923_104637176.webp
 
Nice. I'll probably slacken the clusters off a little at some point. I'm hoping it's not like the previous gen when the rear clusters were prone to water ingress depending on how tightly they were screwed down though.

Where have you ordered touch up paint from, Toyota direct? I was meaning to get hold of some anyway just to have to hand, but hadn't got around to it. Was going to go to Toyota but also heard positive stuff about Chipex kits.
 
I ordered chipex. It worked really well on my GT86. I don't think we'll suffer the same issue 🤞The units are completely enclosed they aren't sealed against the body.
 
Cheers for the heads up @ZN8 & @Conscript . I haven't spotted anything like this on mine, but I haven't really been looking for it.
 
Fooks me that is some chunk out of the paintwork, it's right down to the metal innit?! I dunno about a chipstick - you'll need a bucket of filler. Couldn't this be claimed under Warranty?
 
For this particular problem there is too much hassle and risk for me, I've had a couple of bad experiences and something @Conscript can also attest to!

The first hurdle is getting my Toyota dealer to understand and recognise the problem in the first place, then for them to actually come up with a solution, which is going to be something improvised anyway. Next there is the hassle and risk of getting that corner resprayed and blended for the sake of 3mm chip in the paint, which is likely to never to be as good as what came from the factory, after all this in my case I'd have to pay to have the ceramic coating put back on. I also don't know how long I'd be without the car. The harsh reality is it would probably come back with more marks on it than when it went in.
 
Sorry to hear that guys. No paint chip on mine luckily, but there is a small indentation from minor contact at some point on passenger side.

Personally I would defo try to claim under warranty if mine was bad. If you touch it up with a pen and you’re not happy with it, they won’t cover it later if it gets worse.
 
Stupidly I decided to go to toyota to get my bumper repaired. They agreed without question when they saw the issue and the fact they fitted rear proximity sensors.
Well as you can now guess things haven't gone smoothly.
I took the car back with me and to my detailer to get the ceramic coat reapplied but despite their best efforts it still looks crap and now I need to send some photos via an app that takes pictures instead of me uploading some, this is a PITA. Not sure if I should take the photos during the day or night as the latter is way more evident. Or show up at the dealer instead. I am doing this through Reading but it is actually the Bracknell GR centre that did the work.

Of course the app won't let me encircle the photos like I have done here

20231209_195250.webp
20231209_195227.webp
20231209_121619~2.webp
20231209_122248~2.webp
 
Sorry to see this mate, it does baffle me when the people involved thought that was going to be acceptable to give back to you? No one seems to take any care or pride in the work they do these days.
 
Stupidly I decided to go to toyota to get my bumper repaired. They agreed without question when they saw the issue and the fact they fitted rear proximity sensors.
Well as you can now guess things haven't gone smoothly.
I took the car back with me and to my detailer to get the ceramic coat reapplied but despite their best efforts it still looks crap and now I need to send some photos via an app that takes pictures instead of me uploading some, this is a PITA. Not sure if I should take the photos during the day or night as the latter is way more evident. Or show up at the dealer instead. I am doing this through Reading but it is actually the Bracknell GR centre that did the work.

Of course the app won't let me encircle the photos like I have done here

View attachment 22885View attachment 22886View attachment 22887View attachment 22888
This is totally unexpectable, which you obviously know. Annoyingly our consumer rights law say's we have to give the company a chance to put this right. On a positive note you're in a strong position to negotiate the free application of ceramic coating once you are happy with the repair.

I hope you get this sorted
 
Was in bed this morning and read this post, bang goes me enjoying my breakfast in bed, up and in the garage looking at the rear light clusters. The car is a September 23 second batch car, with less than 200 miles on it.
Can confirm near side looks fine with a >1mm round the lens perimeter, offside is touching on the top of the rear 3/4 panel. I have taken some pics to assist others in when the clips are located. I noticed that there is a white clip with a 10mm hex base, it simply screws out. I had a suitable size rubber o-ring which I used to extend the position of this connector, just enough whilst also maintaining a good seal with the o-ring (if anyone has any other suggestions please post) . Fitted it back and there is now a good >1mm all the way round.

Guys, a big THANKYOU for calling this out, can only echo the sentiments for members to have a look at their GR86’s.
IMG_2696.jpeg


IMG_2698.jpeg

IMG_2699.jpeg


IMG_2700.jpeg


IMG_2701.webp
 
Last edited:
Thanks for sharing Gibbo, nice to know there is adjustment built in, very handy, if not frustrating (should be checked at the factory)
 
@ZN8 did you ever get around to getting a Chipex pen for this, and if so, was it a good colour match? I still need to buy one to sort this out.
 
Looks like something I need to check over the winter whilst the car is tucked away in the garage on the battery conditioner.

Gibbo - I presume the adjustment screws you’ve shown adjust the height the lamp sits at in relation to the panel. So wound fully down it’s more likely to sit contacting the bumper/quarter and wound out it pushes the lamp way from the panel and the lamp sits with a gap to the panels ?
 
@ZN8 did you ever get around to getting a Chipex pen for this, and if so, was it a good colour match? I still need to buy one to sort this out.
I have bought a Chipex touch up kit but havent used it yet, I've just put a bit of 'helicopter tape' over the chip for now.

If you wanted a genuine Toyota touch up kit, one is available here.

I've used both Chipex and Toyota OEM stuff before, they work equally well and the colour match was good but I prefer Chipex as the shelf life is much longer.
 
Back
Top