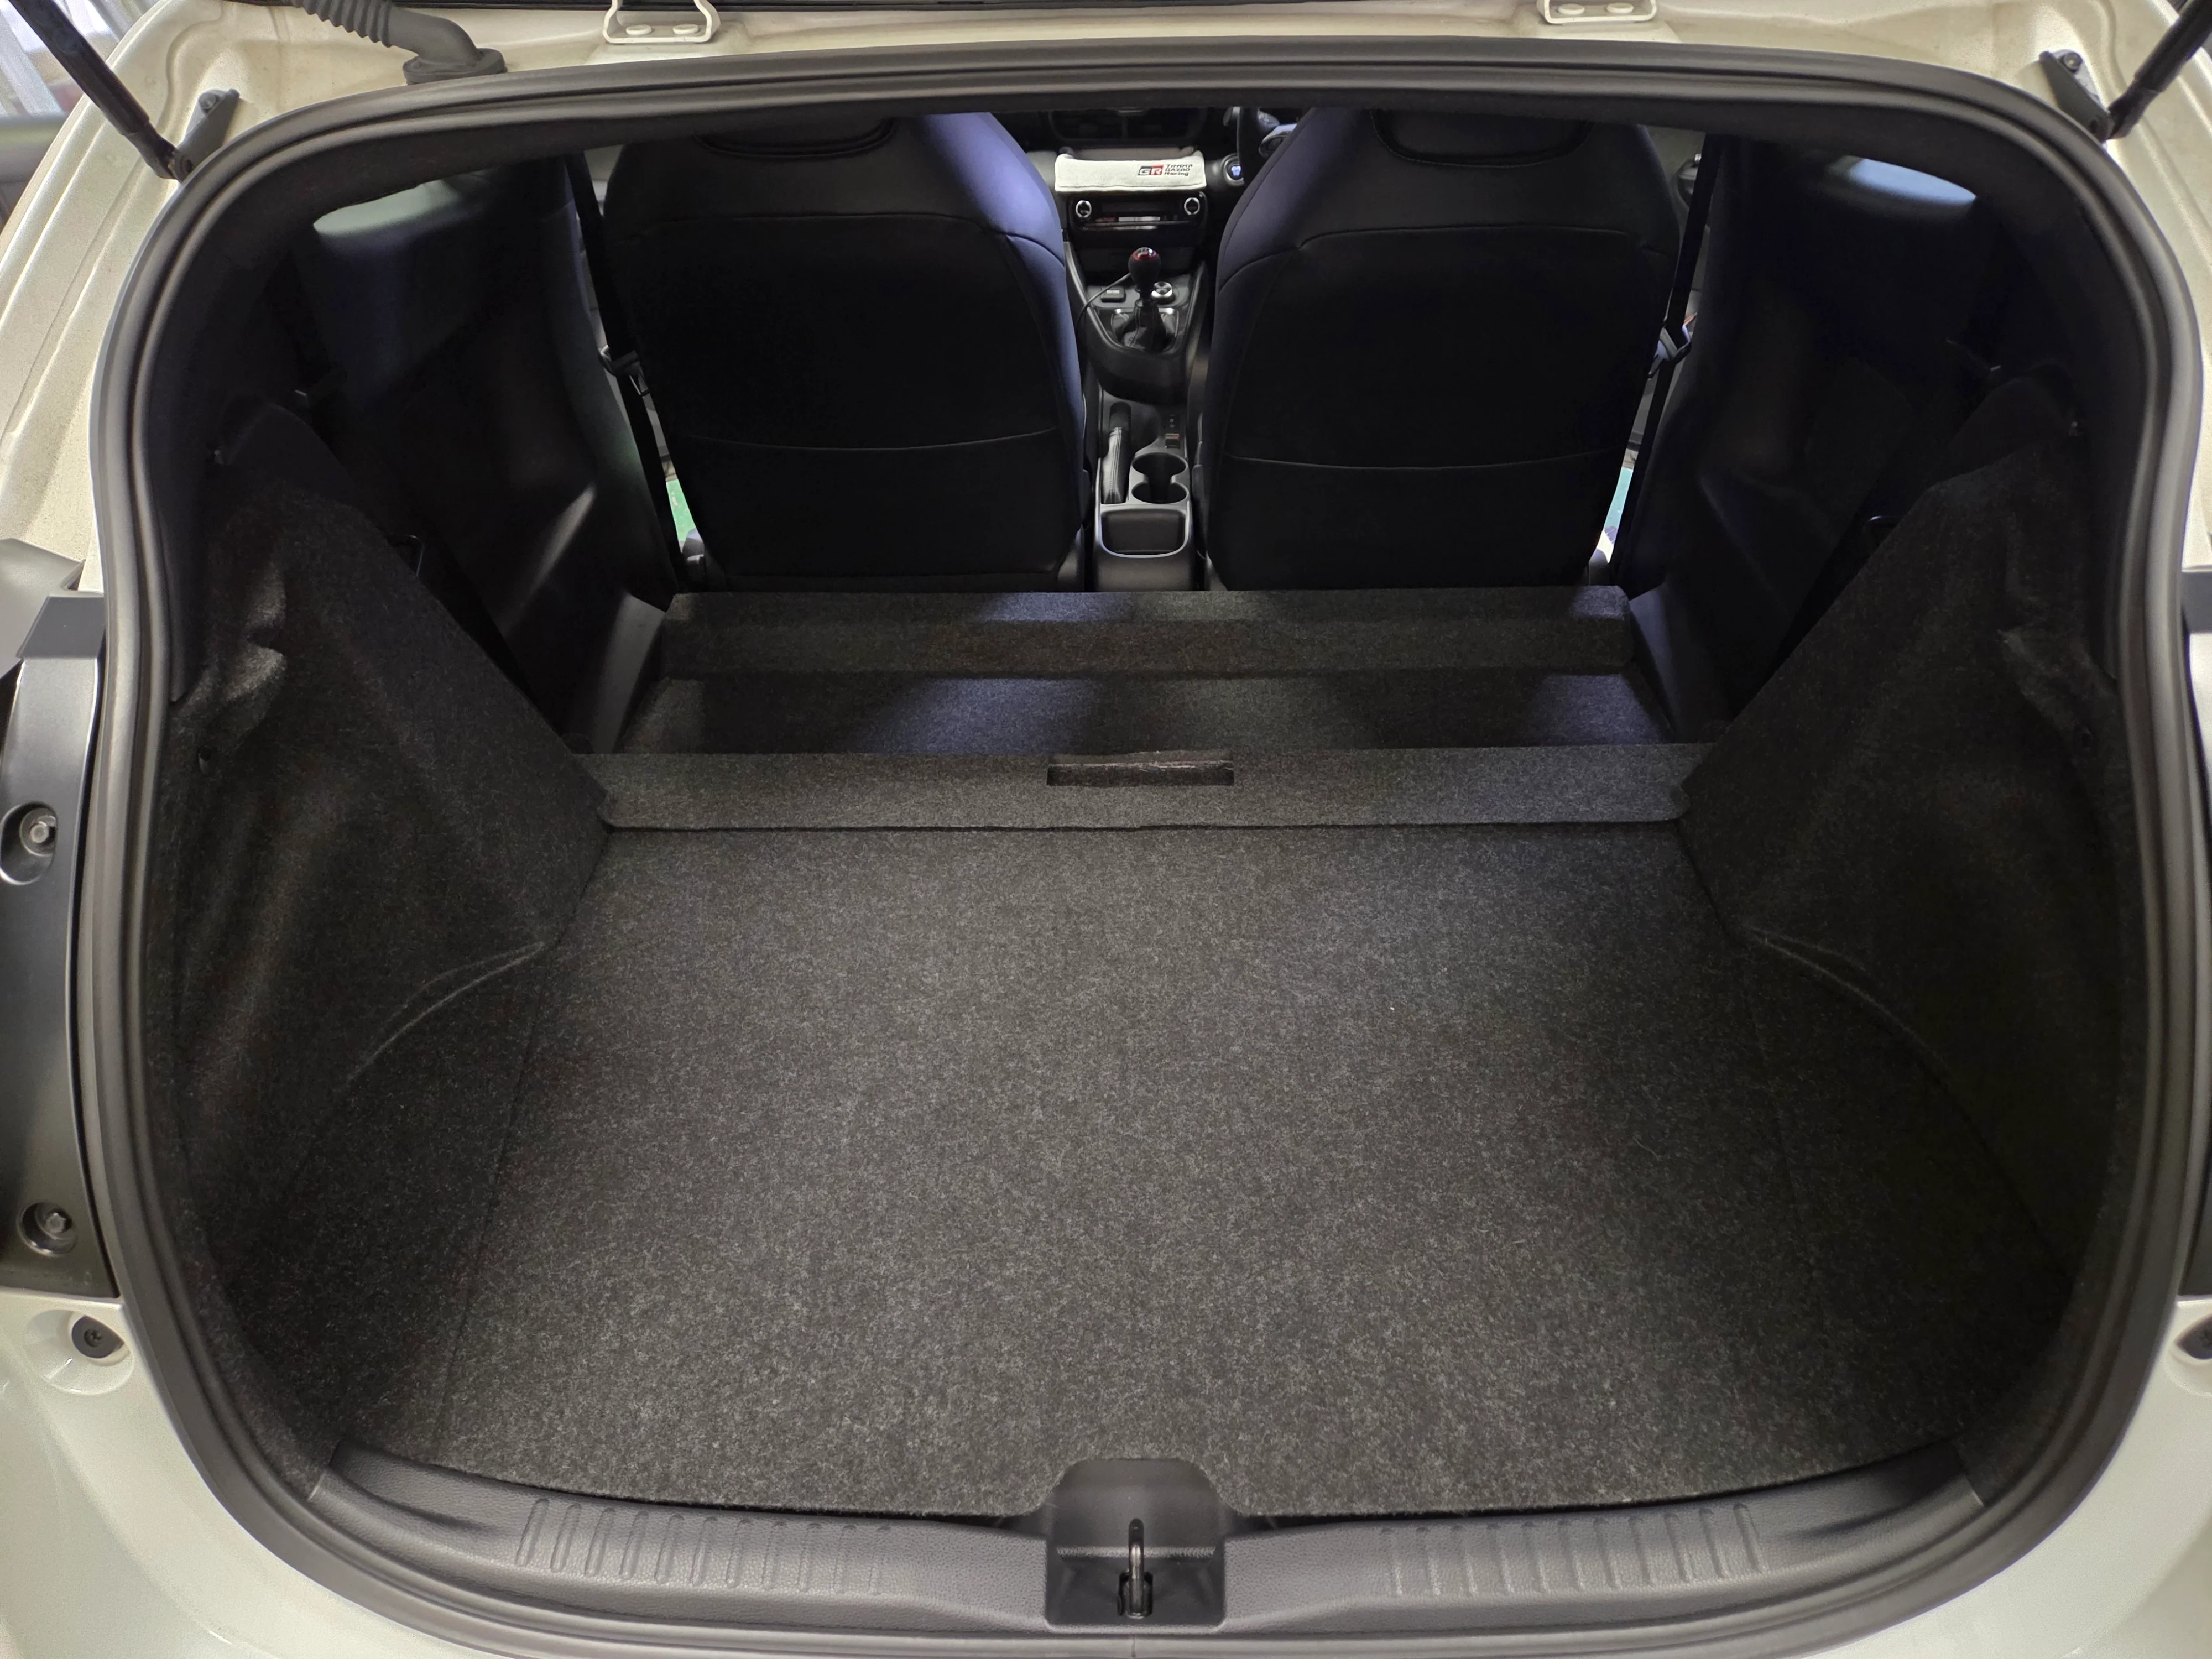
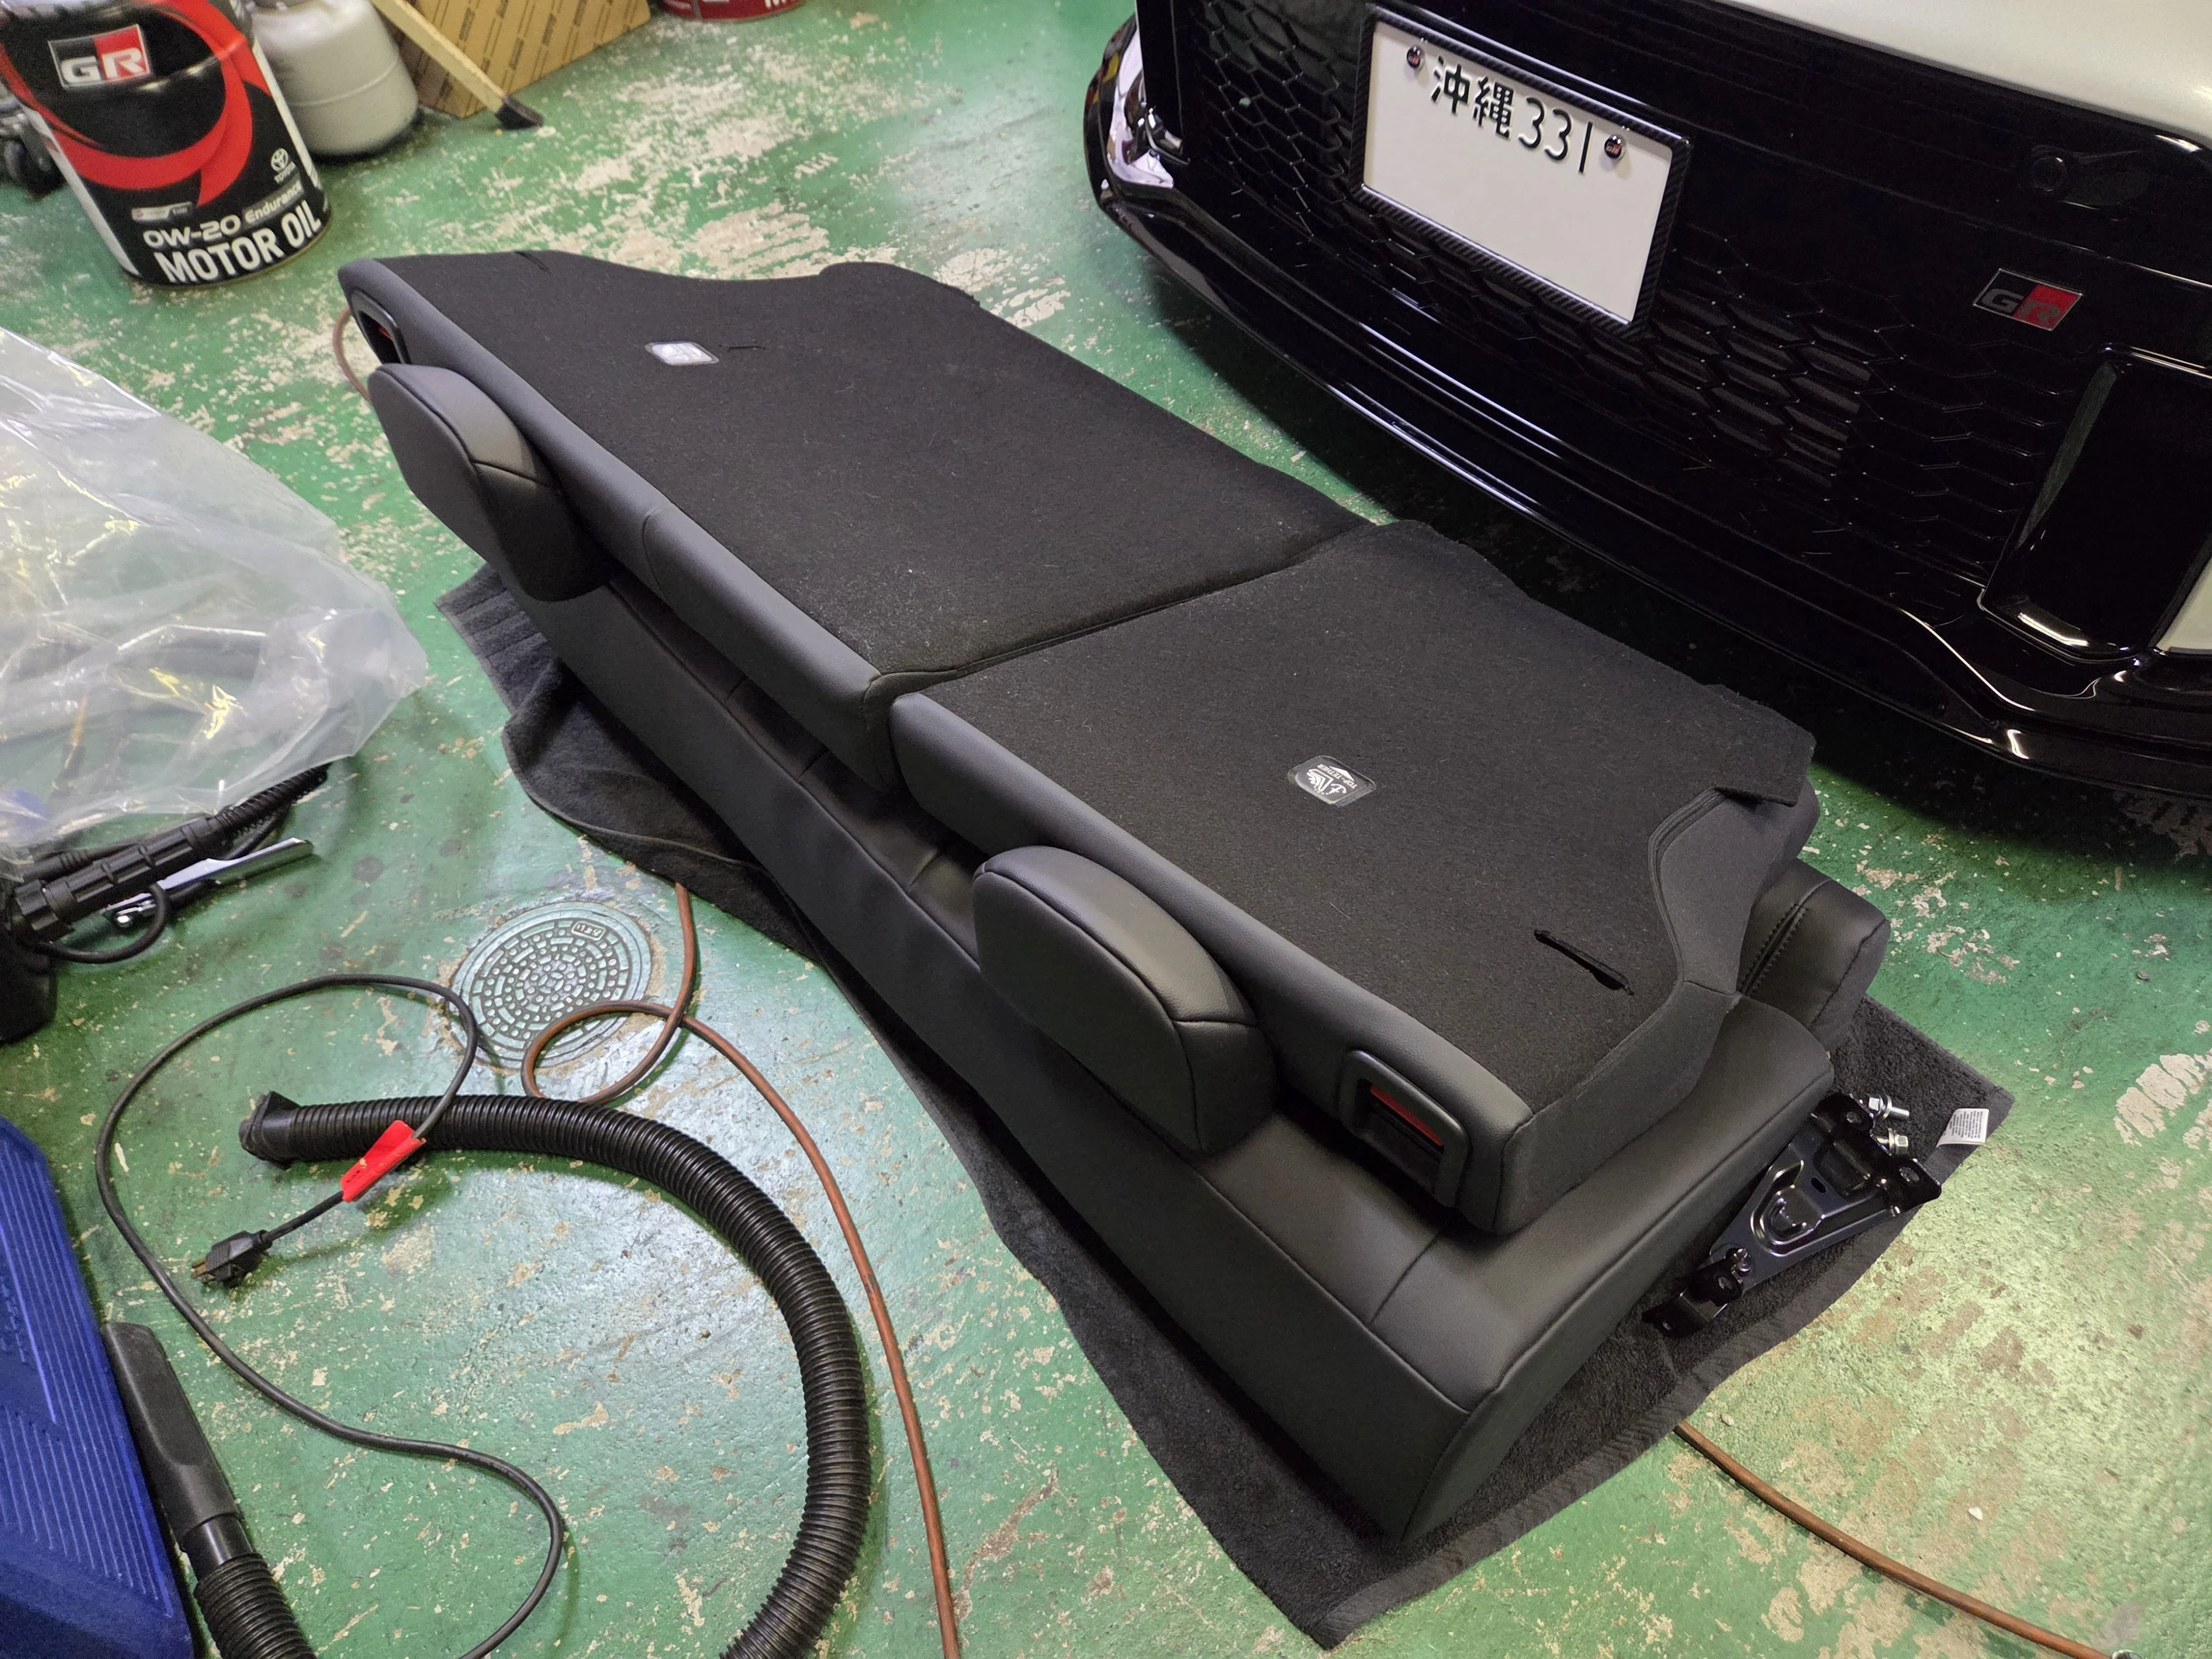
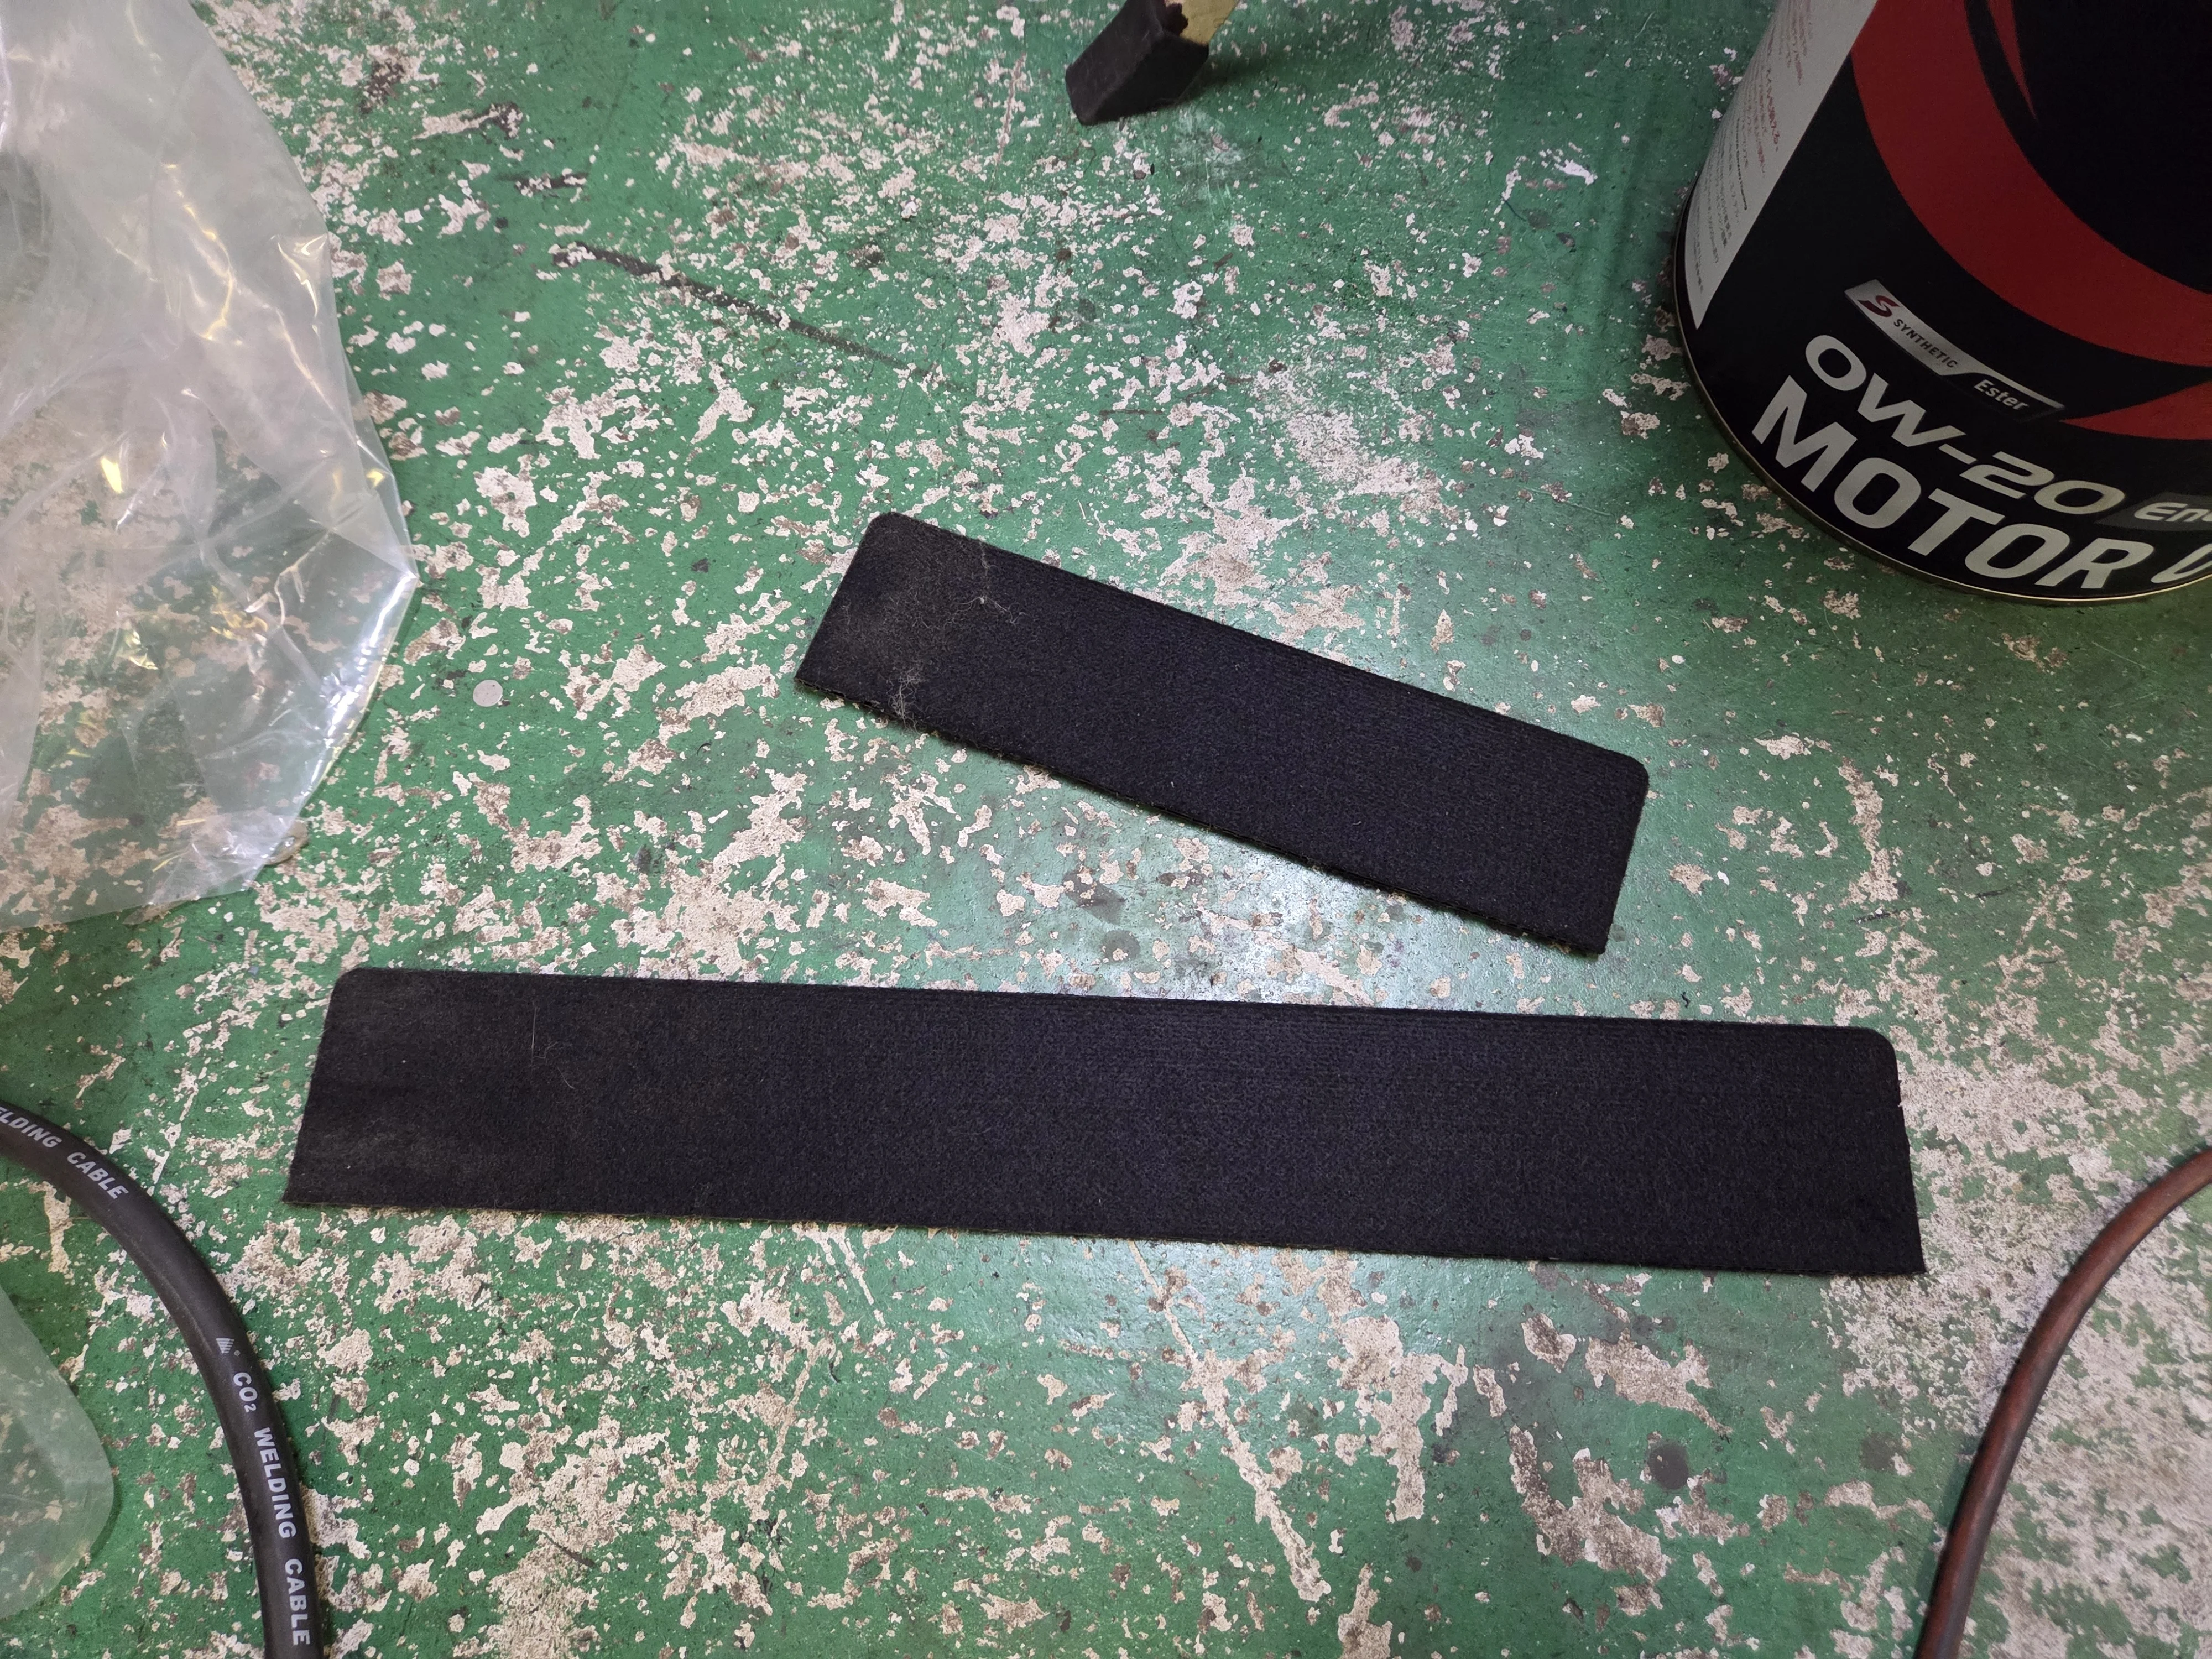
GR Yaris GRMN Rear Seat Delete

sixtentouge

Totally Hooked
Joined
Aug 28, 2023
Messages
206
Reaction score
844
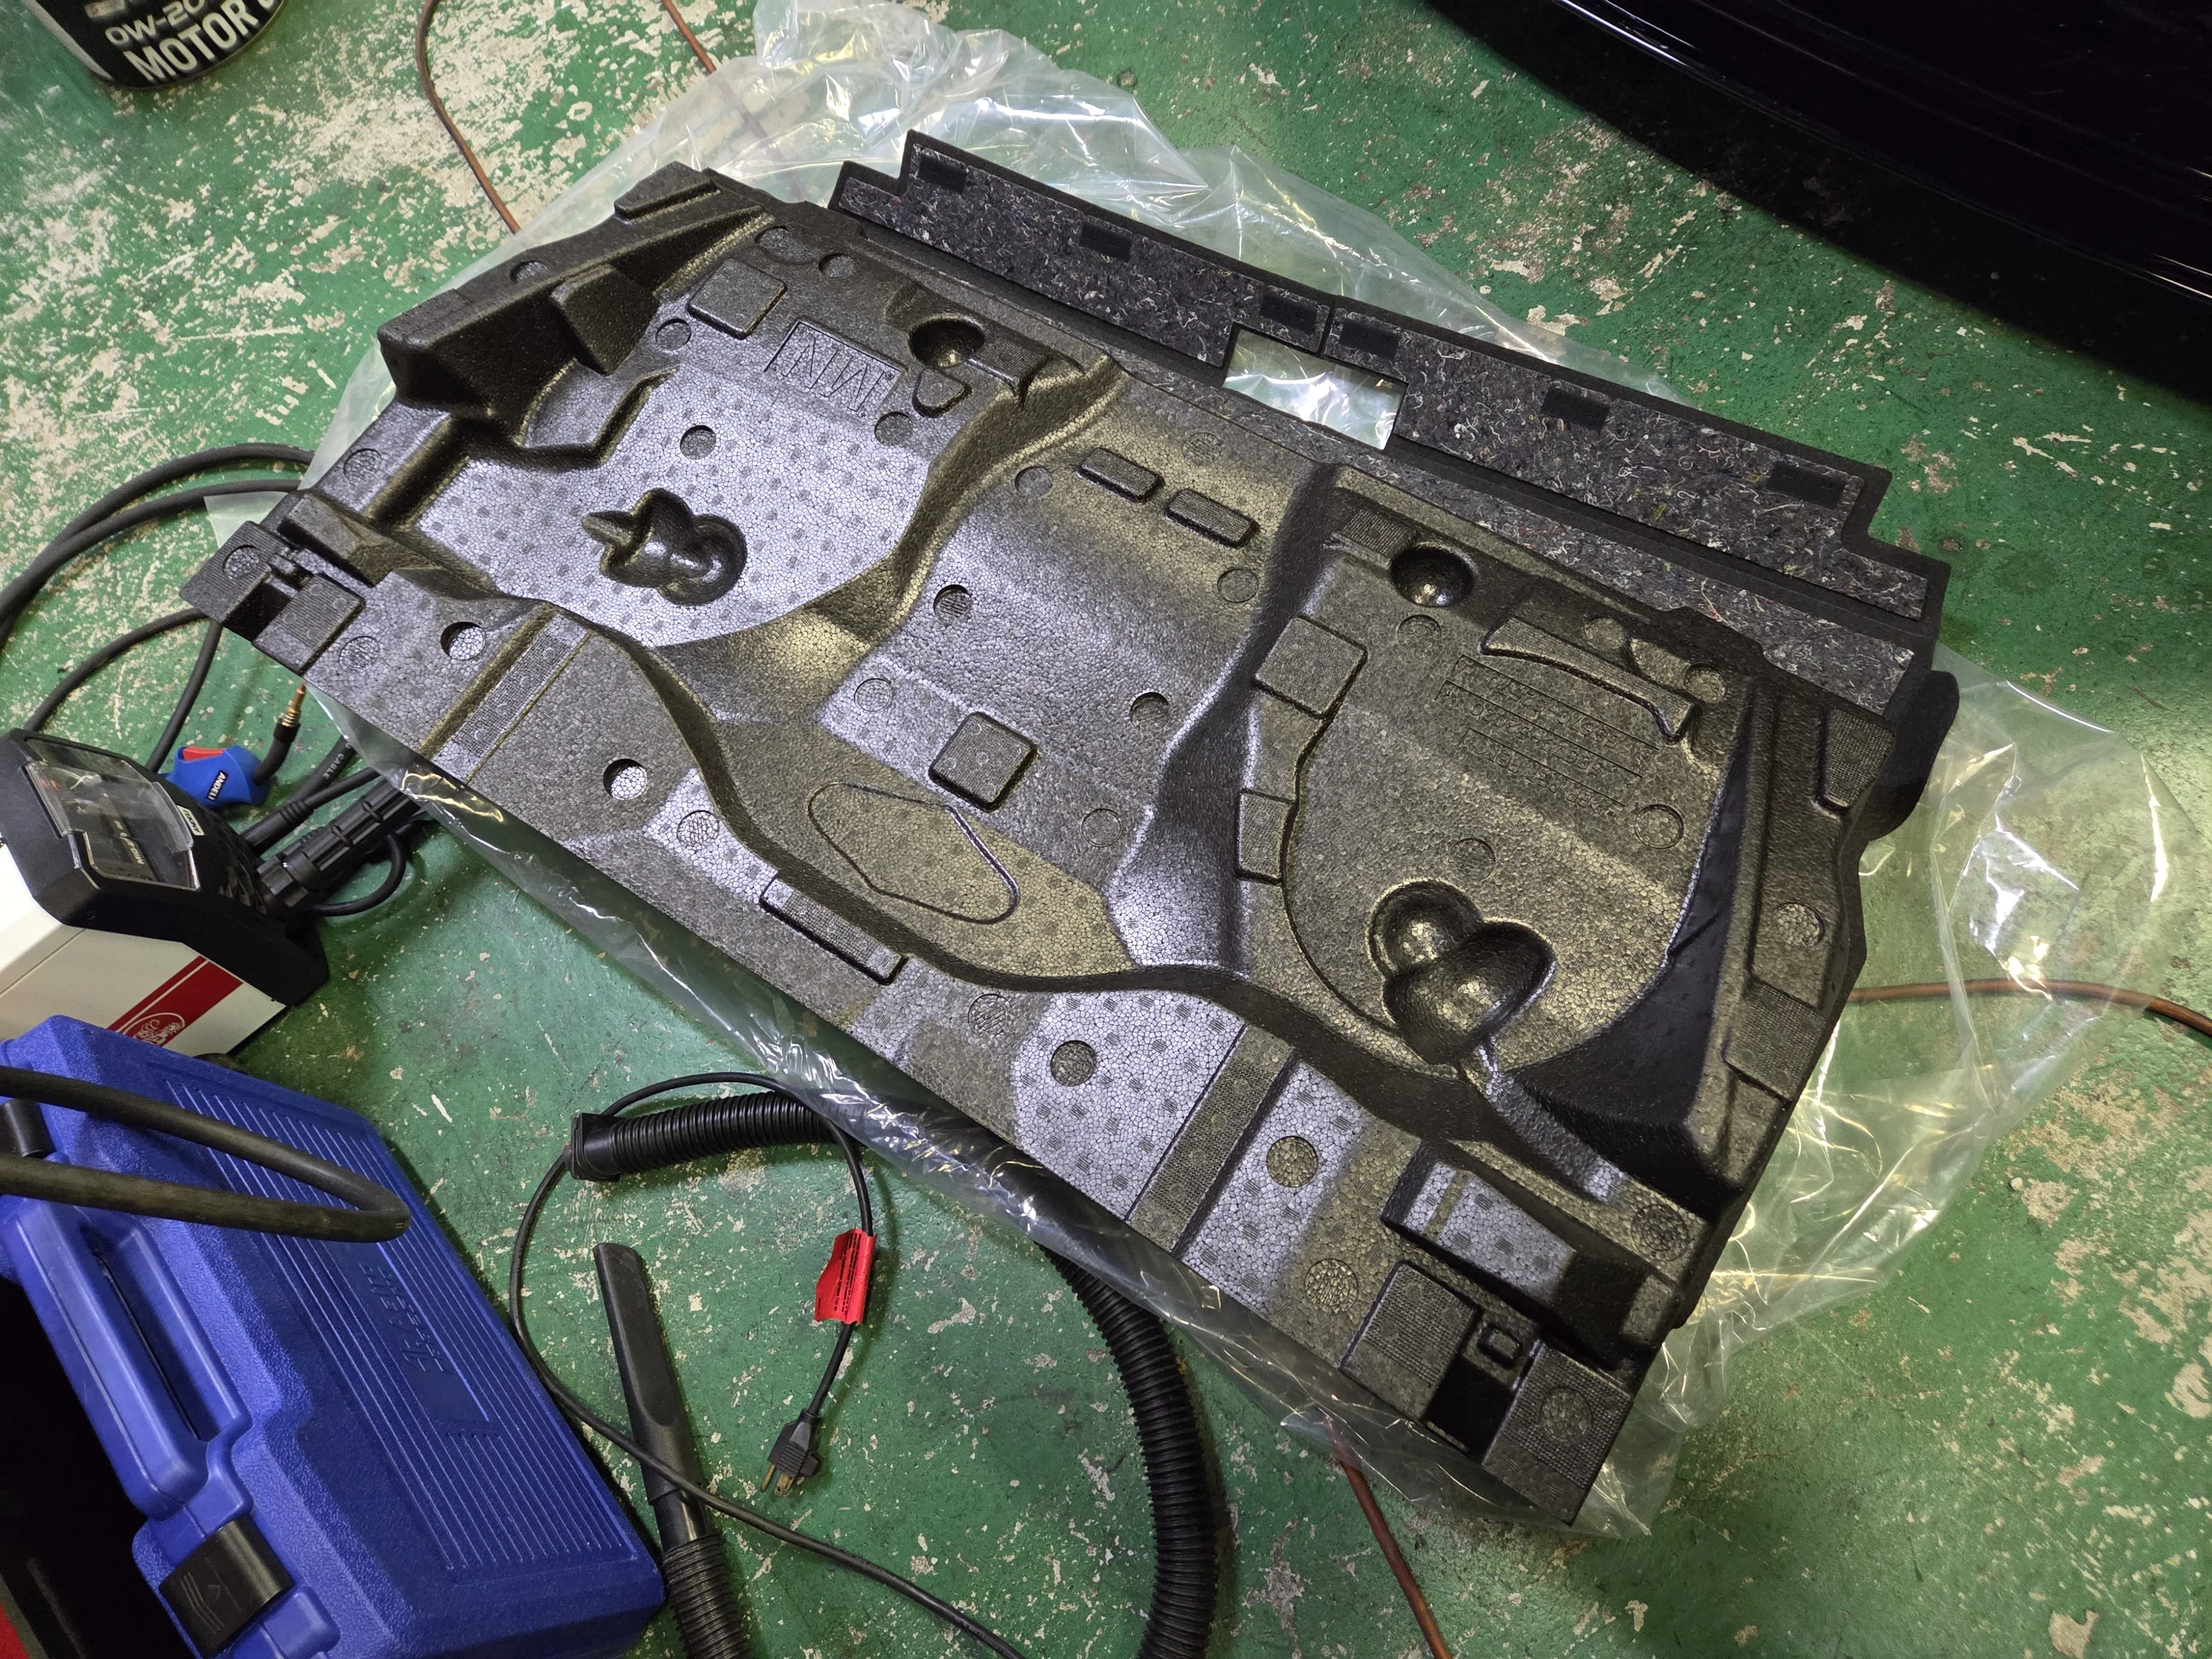
Cross posting this from "What Did You Do" thread, as someone looking for interior stuff may find it useful here...

Anyway, Reat seat delete for GRMN rear. To make it fit clean, the rear cover forward folding tabs must be trimmed 8cm. I would imagine the GRMN one is different/better.

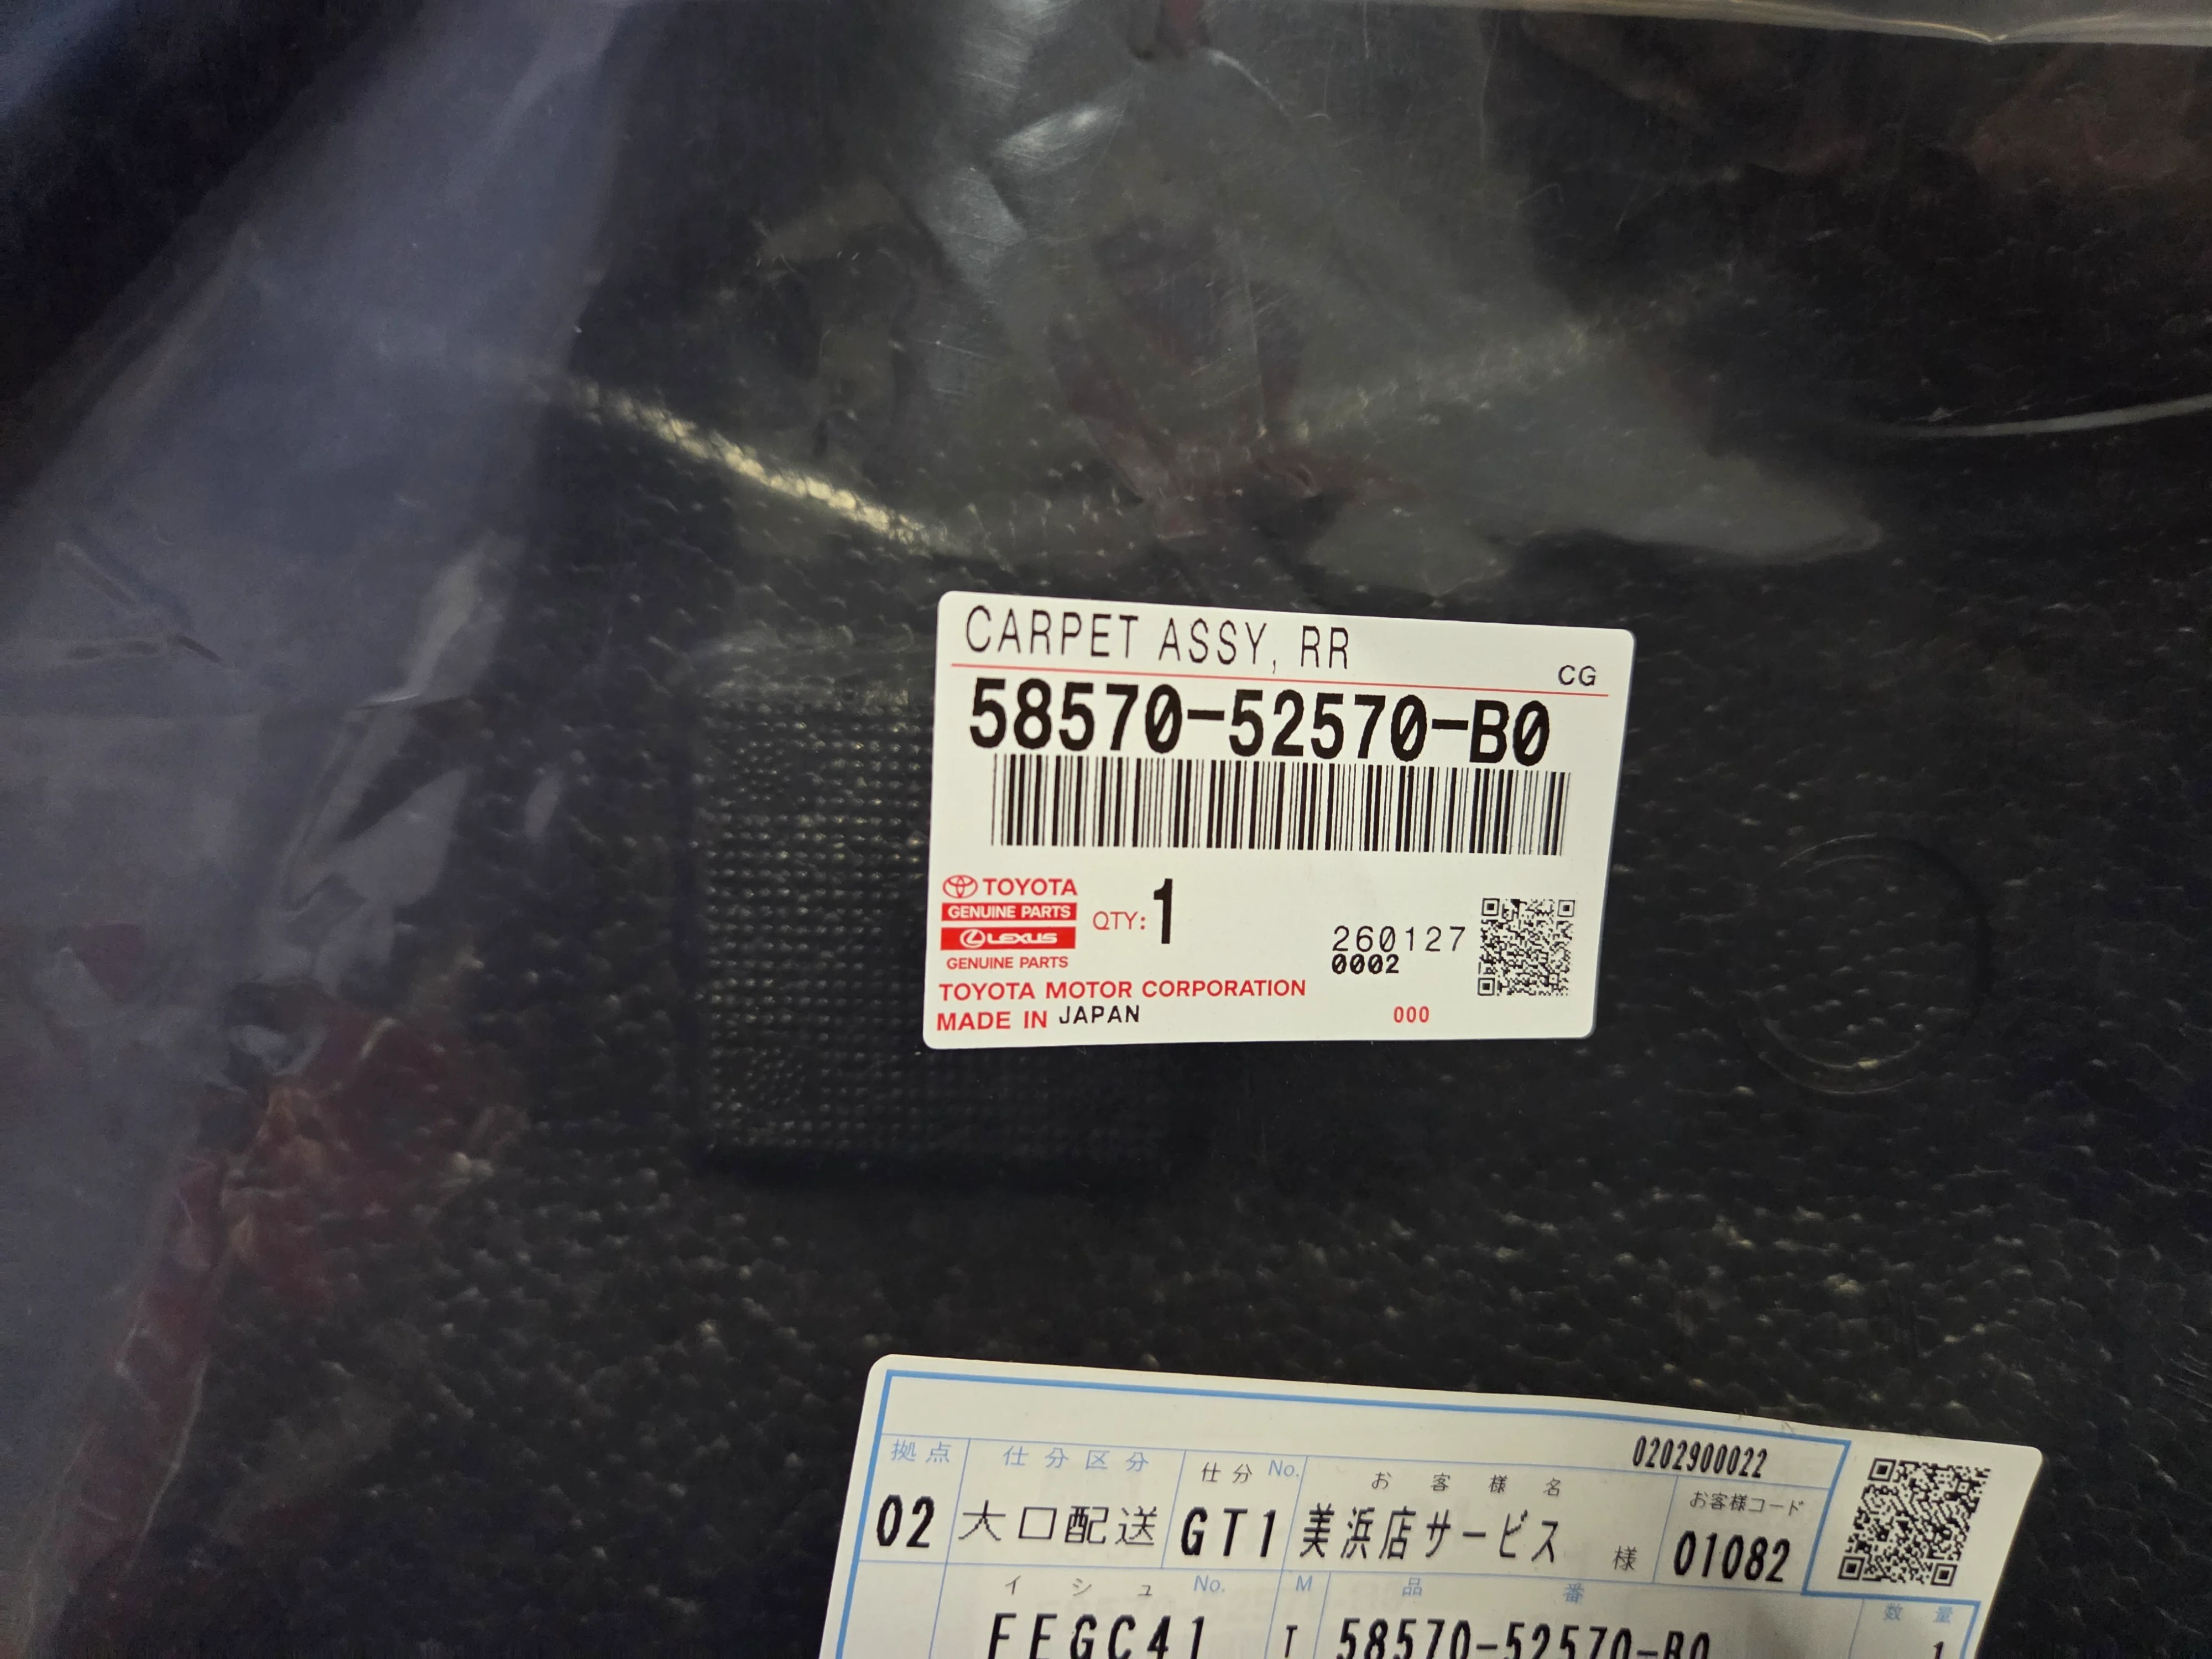
Part No. 58570-52570-B0
Japan Retail Price: ¥43,890

Weight: 2.8kg

Stock Weights
Seat Bottom: 4.5kg
Right Back: 6.8kg
Left Back: 4.8kg
Hardware and lower Buckles: 1.5kg
Total 17.6kg
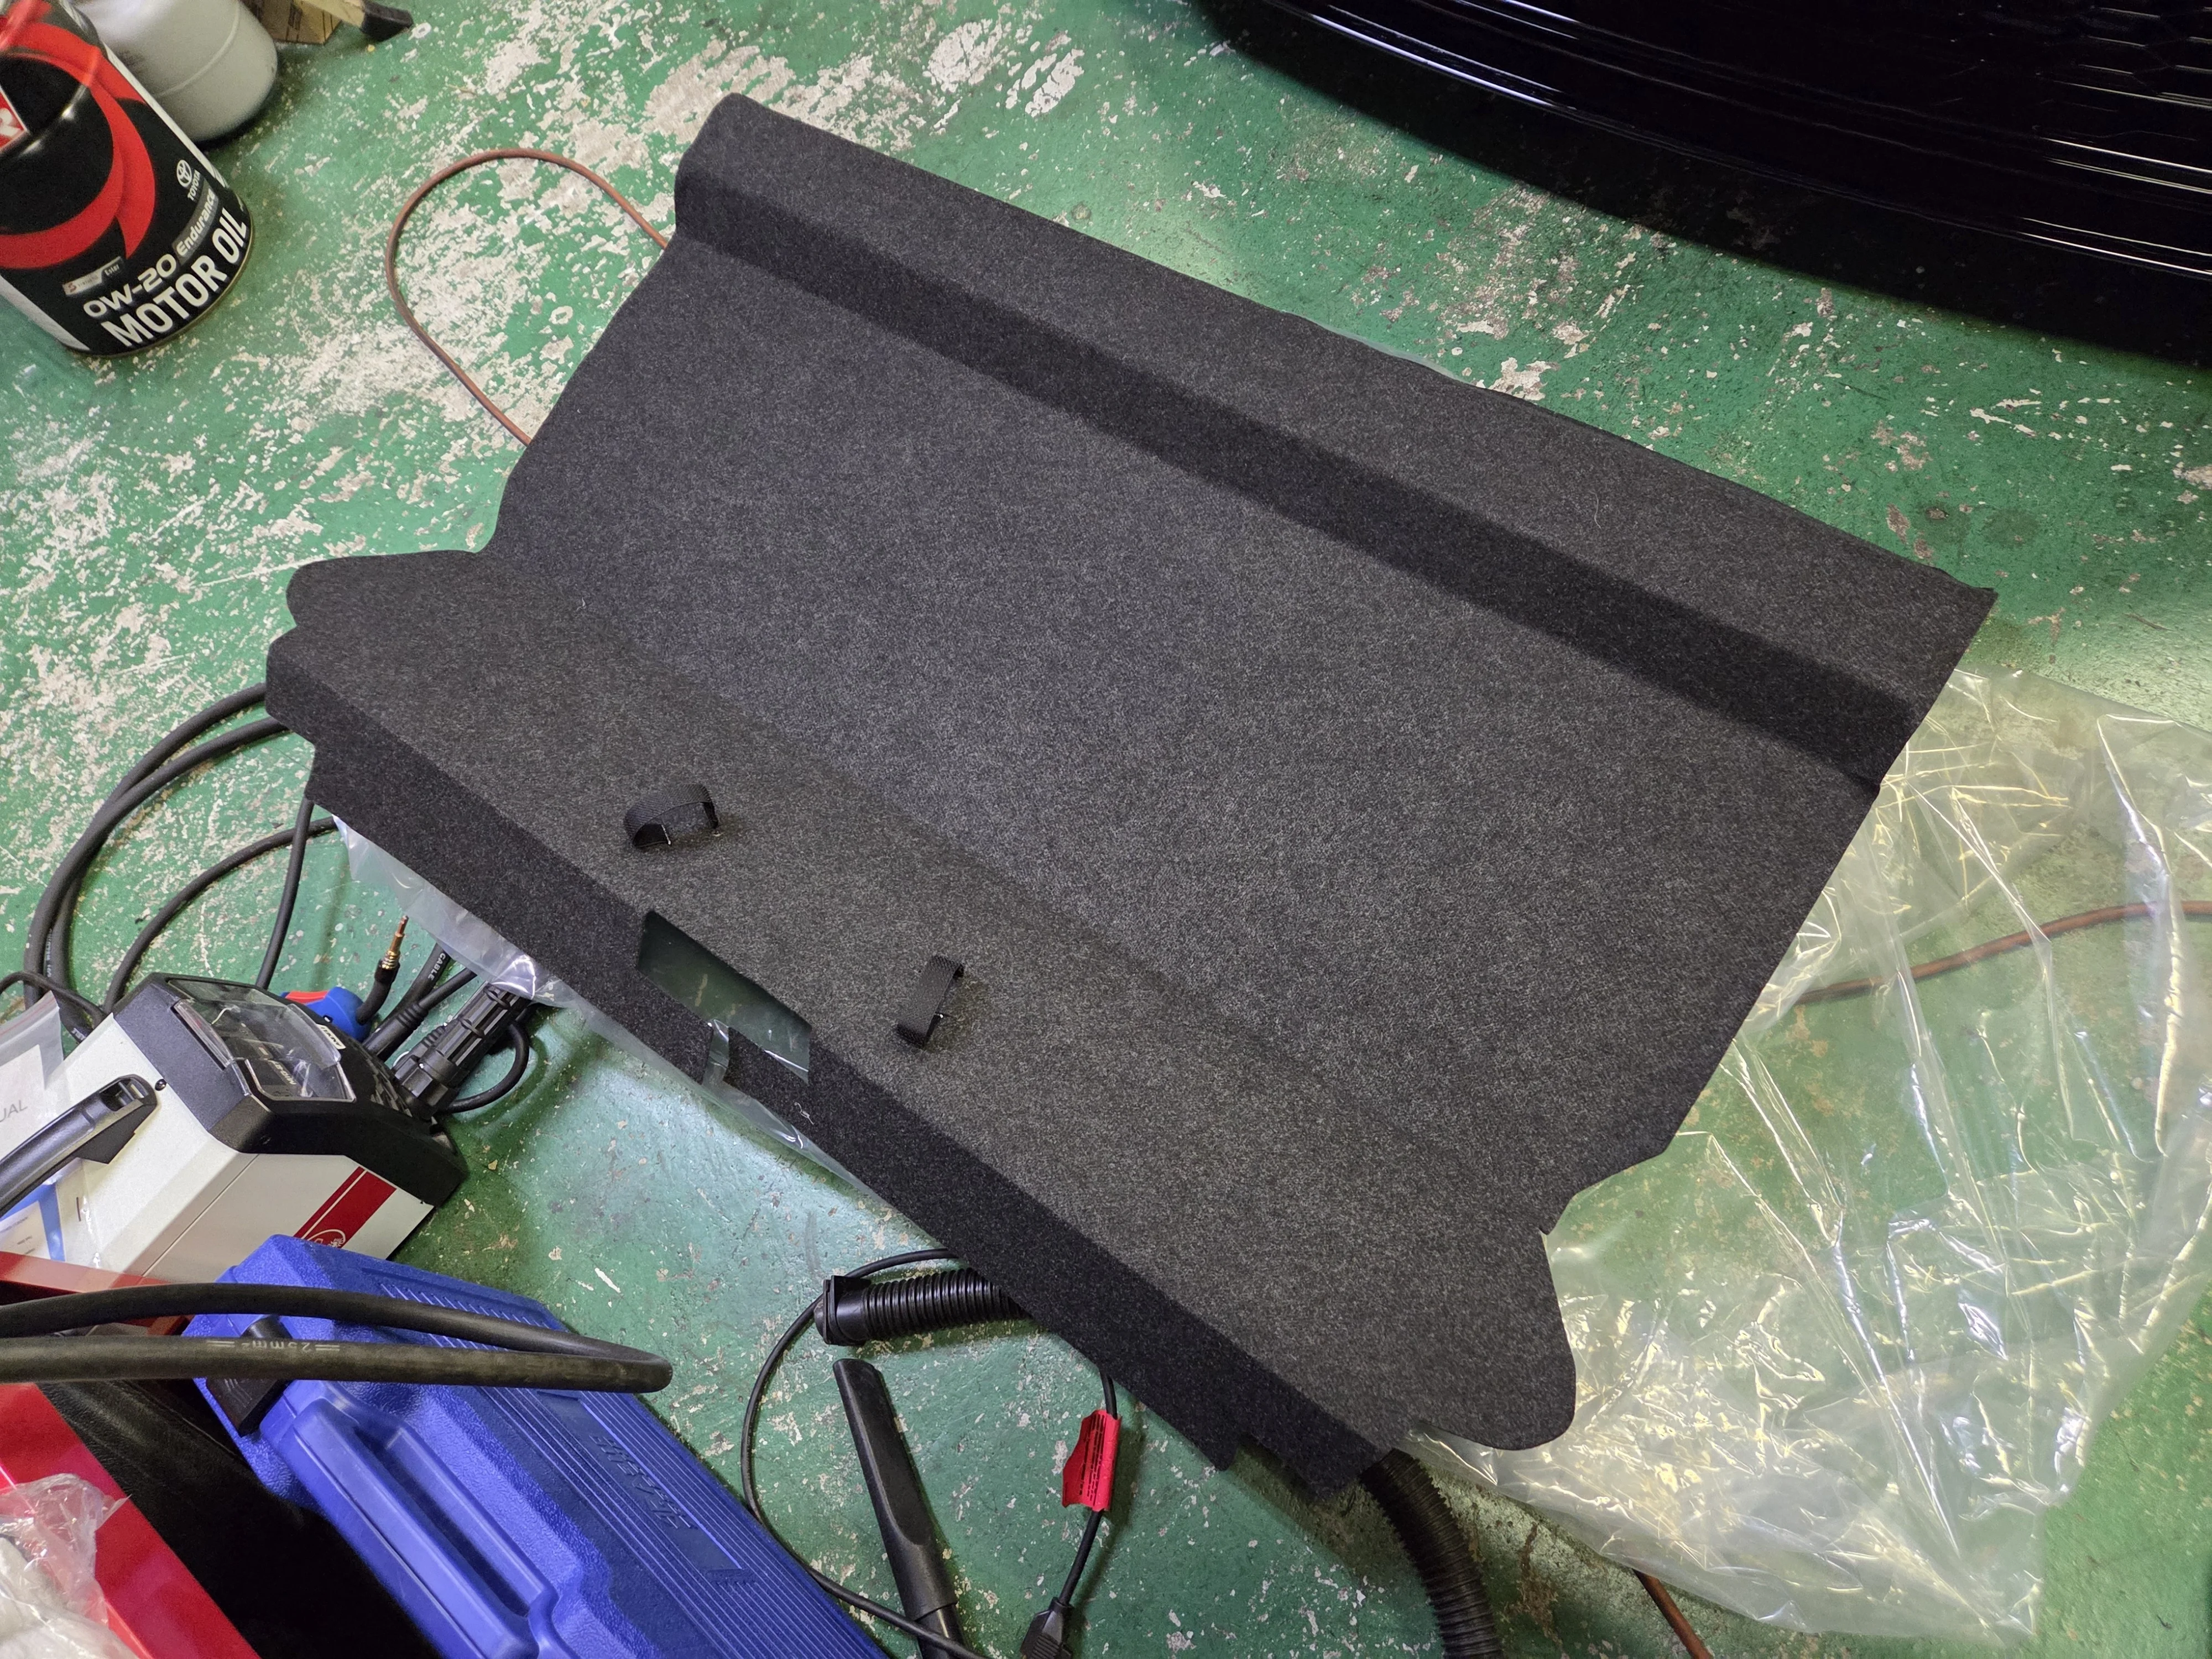
1.webp


2.webp


3.webp


4.webp


5.webp


6.webp


7.webp
 
What's the increase noise like?
I suppose that foam underlay helps.
 
Cross posting this from "What Did You Do" thread, as someone looking for interior stuff may find it useful here...

Anyway, Reat seat delete for GRMN rear. To make it fit clean, the rear cover forward folding tabs must be trimmed 8cm. I would imagine the GRMN one is different/better.

Part No. 58570-52570-B0
Japan Retail Price: ¥43,890

Weight: 2.8kg

Stock Weights
Seat Bottom: 4.5kg
Right Back: 6.8kg
Left Back: 4.8kg
Hardware and lower Buckles: 1.5kg
Total 17.6kg
So all you need is that part to carry out the seat delete?
 
What's the increase noise like?
I suppose that foam underlay helps.

I can't tell any difference. Of course my car is pretty noisy, with Cusco mount and CR-S tires... :) But the noise you get with just a sheet metal interior isn't there.
 
So all you need is that part to carry out the seat delete?

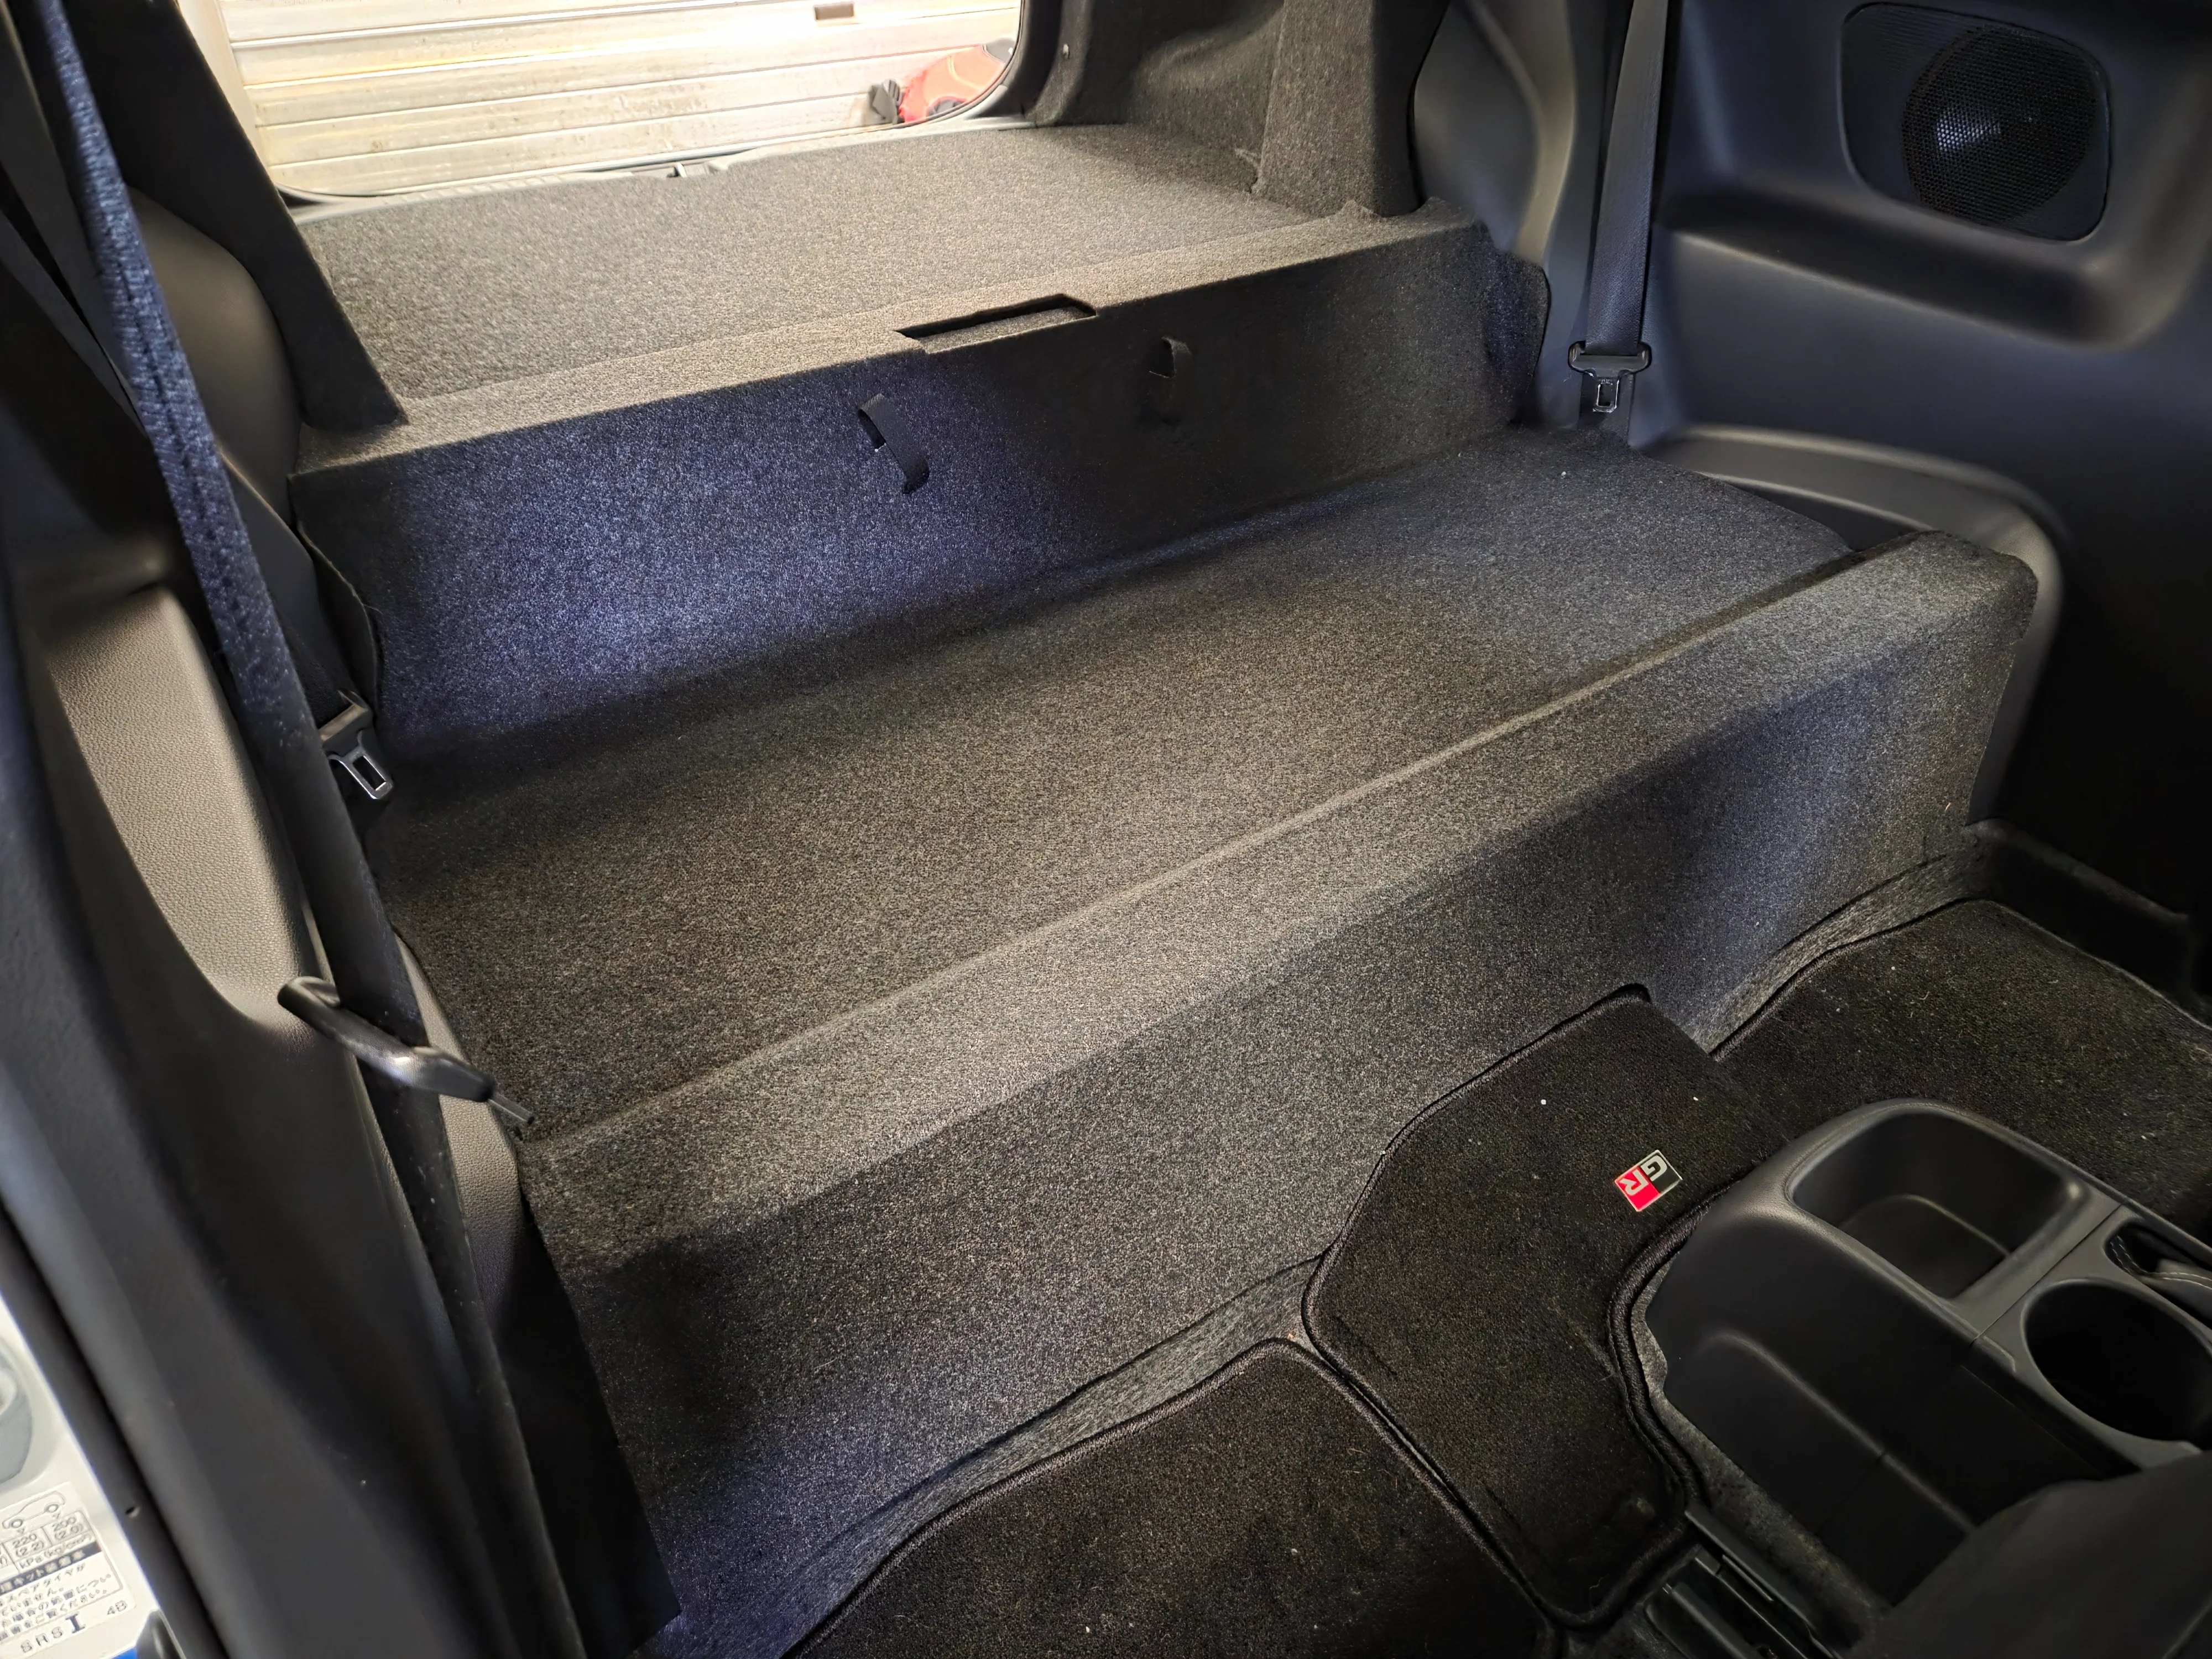
As far as I can tell. It makes the interior look finished. GRMN side panels are the same, and even have the seatbelt holes. I believe the rear battery cover is different, as it's a little long to cover the rear seat gap.
 
I can't tell any difference. Of course my car is pretty noisy, with Cusco mount and CR-S tires... :) But the noise you get with just a sheet metal interior isn't there.
That's interesting because I had a kit fitted that used timber sheets and I have to say it was very noticeable. It got to the point I could not put up with any longer and I removed it. I even fitted sound deadening in the rear section.
I am running the same Cusco mounts that you have plus the Cusco mounts on what "they" call the rear member sub assembly.
 
Finally getting the rear roll bar in and removed the rest of the seat belt and rear seat bracket hardware. Another 2.5kg out for a total of 17.3 loss after adding the GRMN rear floor.

20260321_192121.webp
 
I'm going to get this seat delete and a lithium battery once the Yaris graduates to track car next year.
 
Cross posting this from "What Did You Do" thread, as someone looking for interior stuff may find it useful here...

Anyway, Reat seat delete for GRMN rear. To make it fit clean, the rear cover forward folding tabs must be trimmed 8cm. I would imagine the GRMN one is different/better.

Part No. 58570-52570-B0
Japan Retail Price: ¥43,890

Weight: 2.8kg

Stock Weights
Seat Bottom: 4.5kg
Right Back: 6.8kg
Left Back: 4.8kg
Hardware and lower Buckles: 1.5kg
Total 17.6kg
Hi bro where can i order this part ?
 
Finally getting the rear roll bar in and removed the rest of the seat belt and rear seat bracket hardware. Another 2.5kg out for a total of 17.3 loss after adding the GRMN rear floor.

View attachment 40214
Hi, thanks a lot for the detailed write-up! I ended up following your route.


Quick question: when you removed the seat belts, did you need to install any resistors, or did you simply remove the buckles and disconnect them from the system without getting any errors or warning lights?


Would really appreciate it if you could clarify. Thanks in advance!
I dont think you need any resistors - its enough to just unconnect the wiring.
 
Back
Top